Maybe I wasn't too clear, I wasn't thinking of actually using a strut, just the knuckle from a strut design. The knuckle has two holes at the top that allow you to design a bolt on piece that holds the upper ball joint for use with a double wishbone arrangement. There are many ways to use slugs, shims, reversible part designs, etc to easily move the upper ball joint around within the bolt on piece. Depending on the knuckle it may be difficult to get the desired caster, KPI, etc but at least having the ability to change may be better than nothing. Sorry everyone, I think I have hijacked this thread enough.
Ah Yes! I've done a similar design exercise of making bolt on attachment points to Vue knuckles to be used with rear 88 subframe pick up points. It ended up being easer and lighter to fab a whole new knuckle out of steel. If I still had my machine shop I would do it out of a single billet of aluminum.
There is enough meat in that knuckle to machine off the strut tab and drill a taper hole to accept a ball joint directly.
What is the intended purpose of the car?
------------------ yellow 88 GT, not stock white 88 notchie, 4 banger
I would say a street legal track car. One with competition design aspects with enough ride height and spring rate to not kill you on public roads. It will undoubtedly see more miles on the street than track.
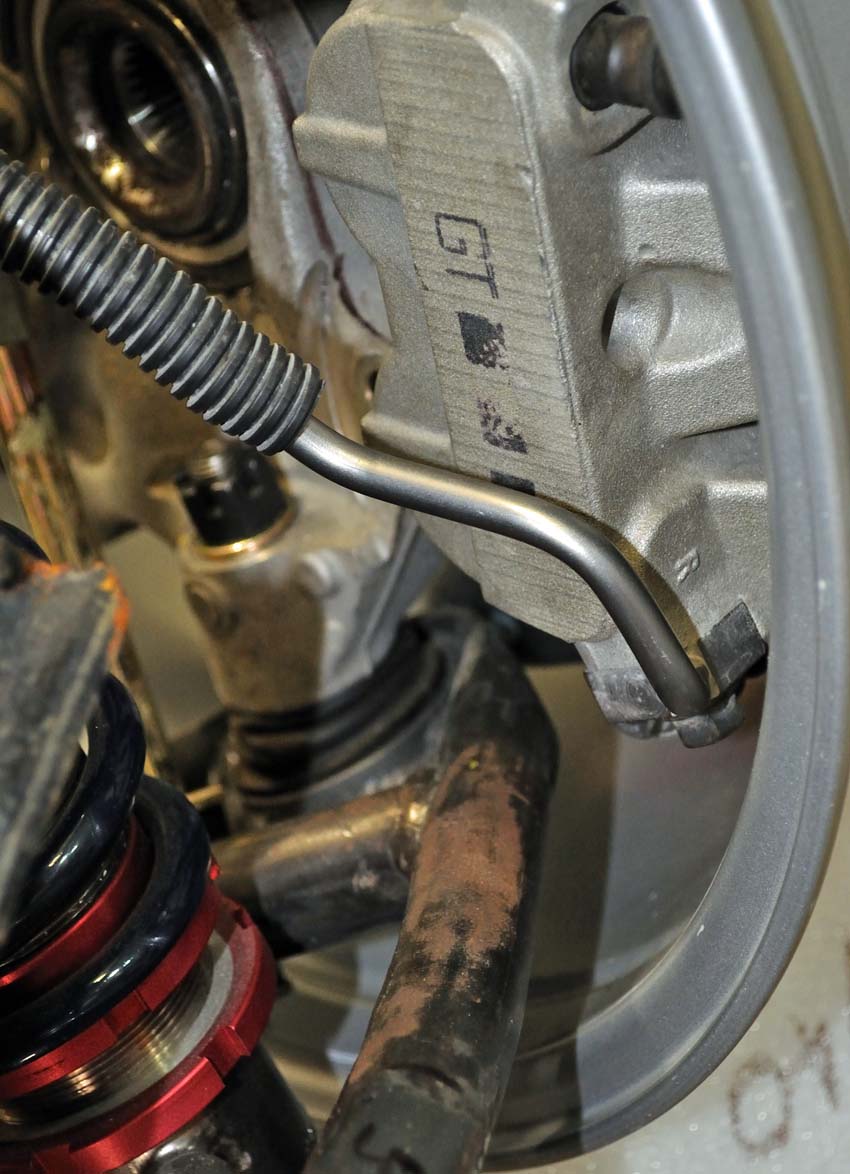
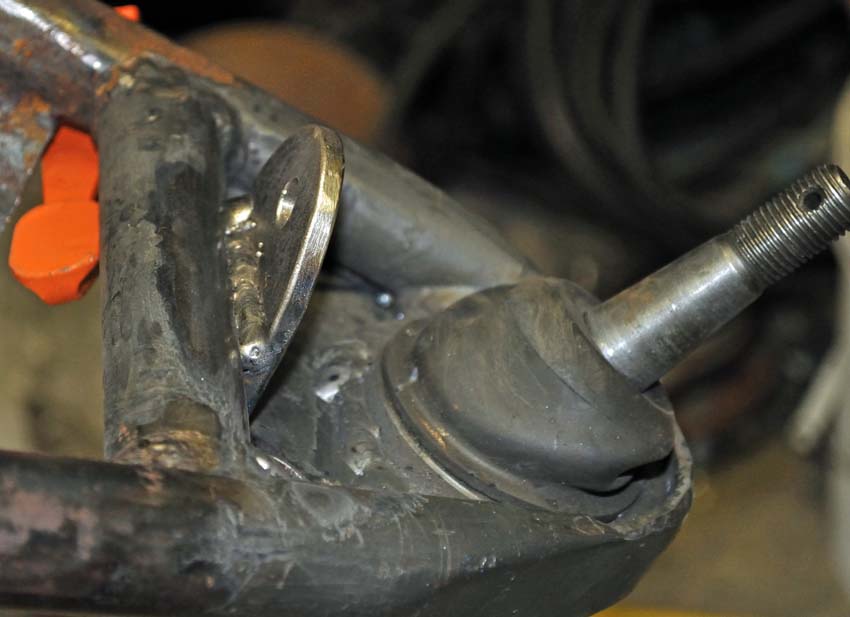
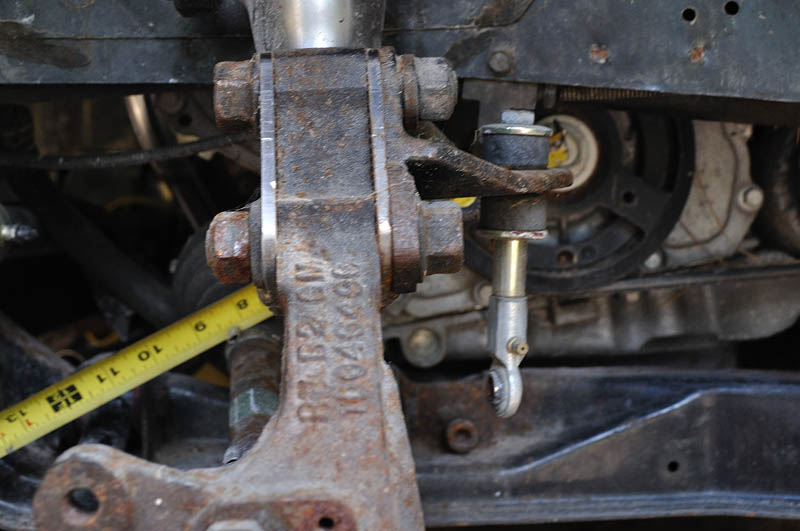
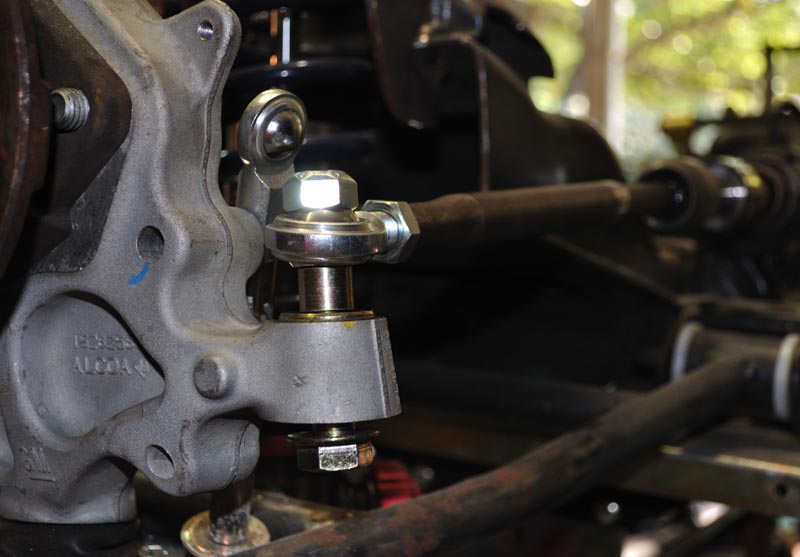
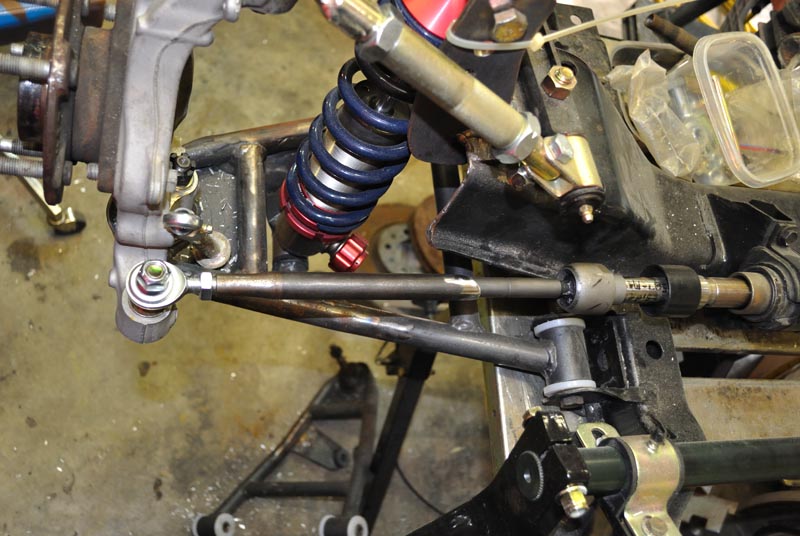
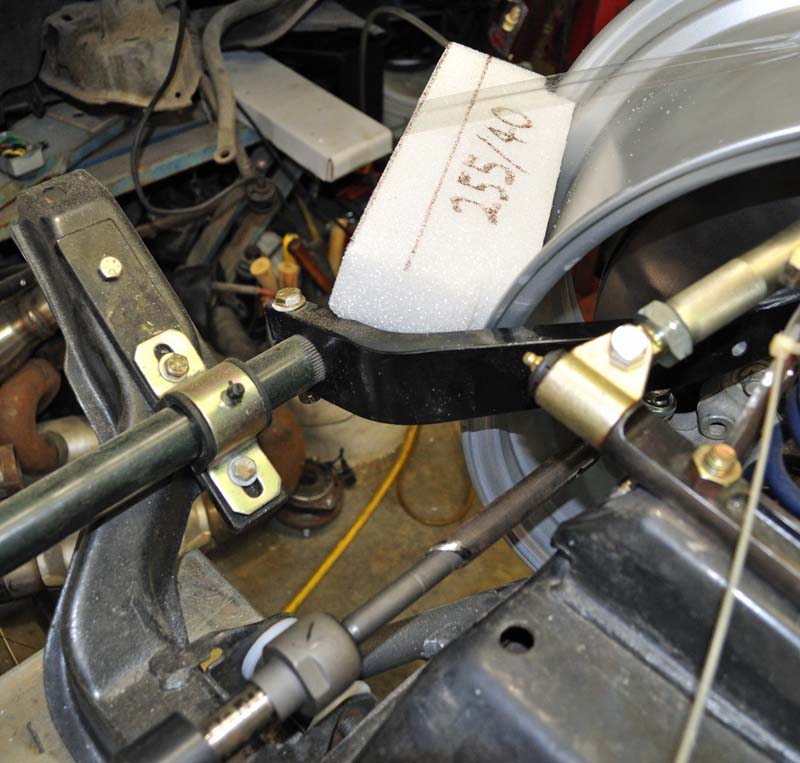
After a long time of not working on the car, I finally found a solution to the steering linkage problem and got busy. The solstice steering arm on the knuckle is kinda high and the big end of the tapered hole faces down. The fiero rack is in such a position that the bump steer geometry would be just about perfect if the tie rod would fit through the top of the steering arm. The bad thing is you can't re-drill the tapered hole from the other side, not enough metal. I'm using Rickady88GT's vette's power steering kit and a ZL1 rack for quick steering.
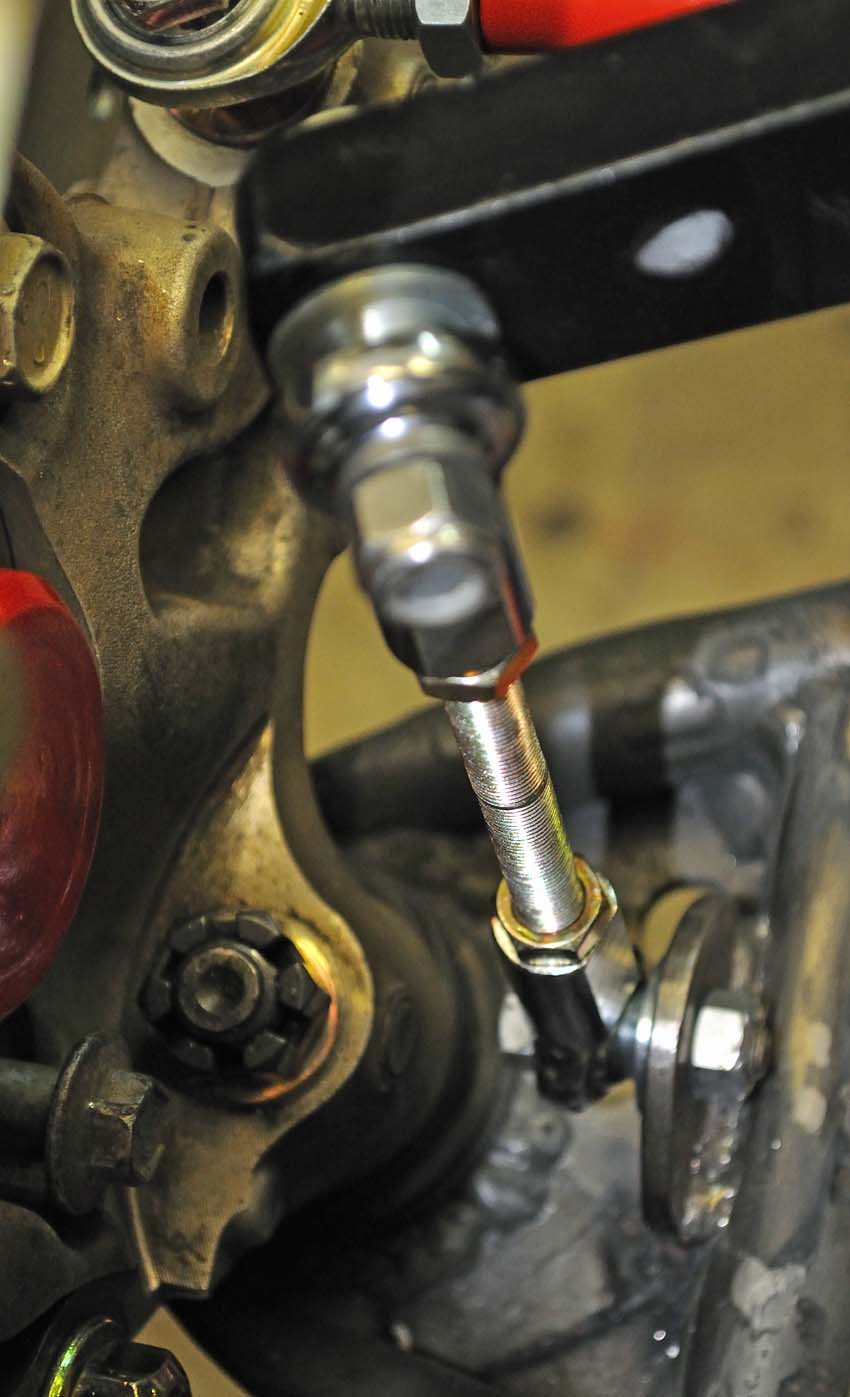
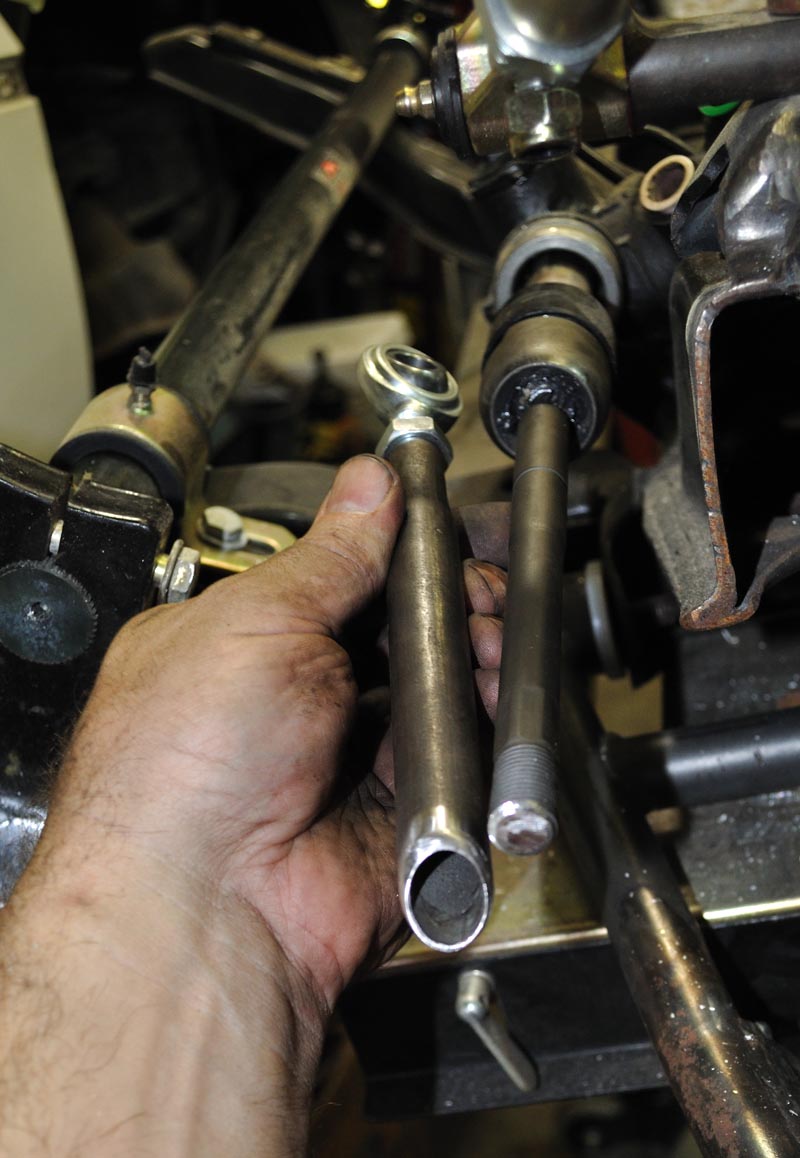
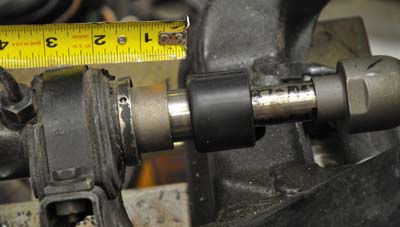
With the rack centered and the hubs straight ahead, this is the gap I had to work with. I found some rack adapters at Chassis Engineering that I could fit over the stock tie rods and weld in place.
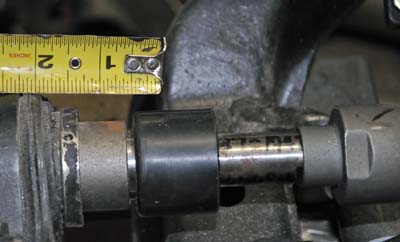
I had to trim down the tube and the tie rod end to allow a little adjustment room on the rod end.
I can now adjust for bump steer once the car is back down on the ground.
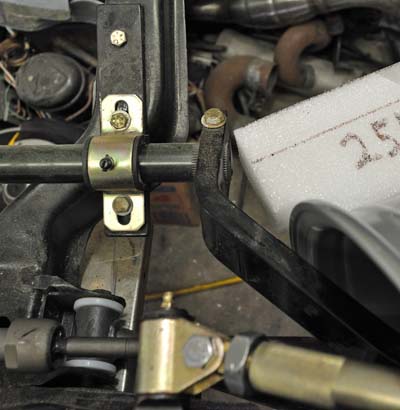
I'll weld them up once I can string the hubs and measure toe. Then paint them.
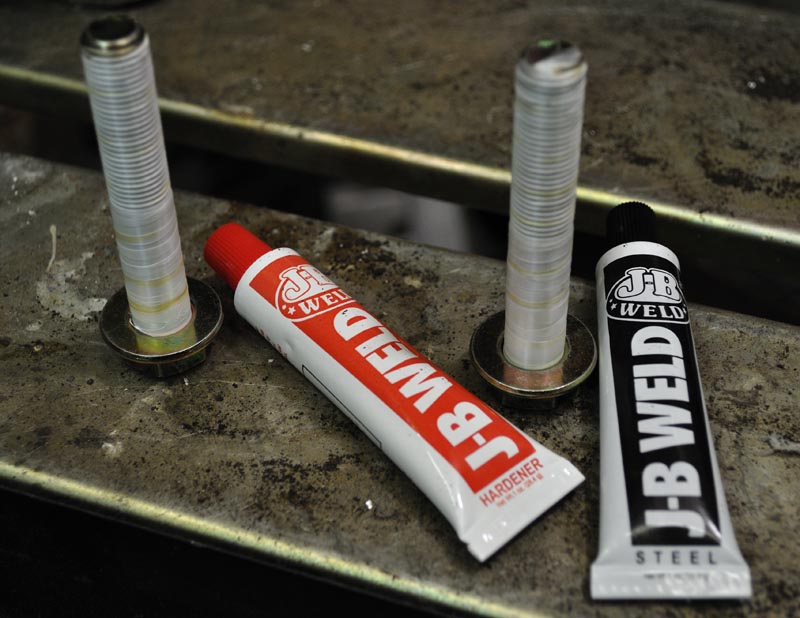
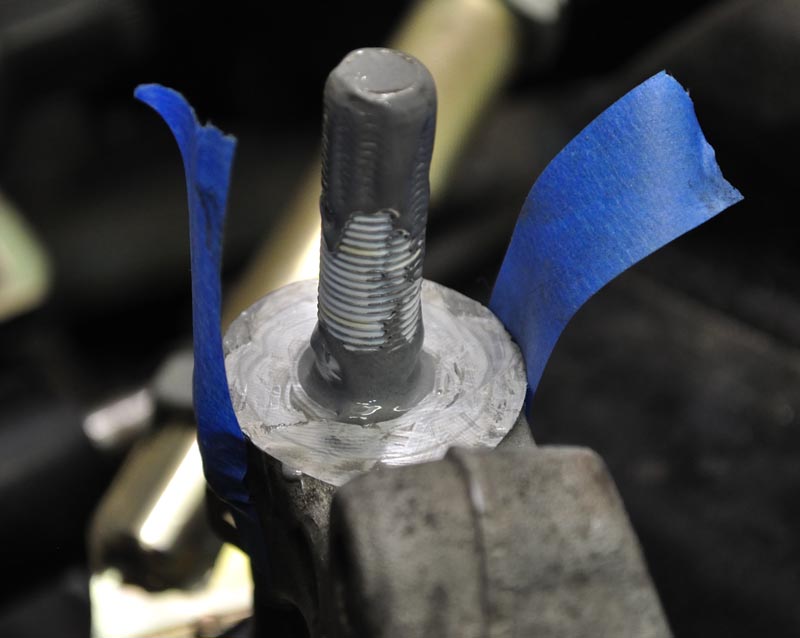
I'm running 1/2" bolts through what remains of the taper in the steering arm. I teflon tape the threads up and filled in with good ole JB.
Hopefully I can get the bolt back out and the fill is void free.
------------------ yellow 88 GT, not stock white 88 notchie, 4 banger
[This message has been edited by ccfiero350 (edited 09-16-2010).]
I got the Vue hubs on the Solstice knuckles and started looking into what rotors I could use for a brake system. The standard Vue rotors could be used but the offset is wrong and it brought the disc too close to the knuckle.
The Vue hub as a 5x114.3 mm bolt pattern with a 71.1 mm pilot hole, which just so happens to be the exact same dimensions as a 95-04 Ford Mustang. So I looked into whats available that would work,
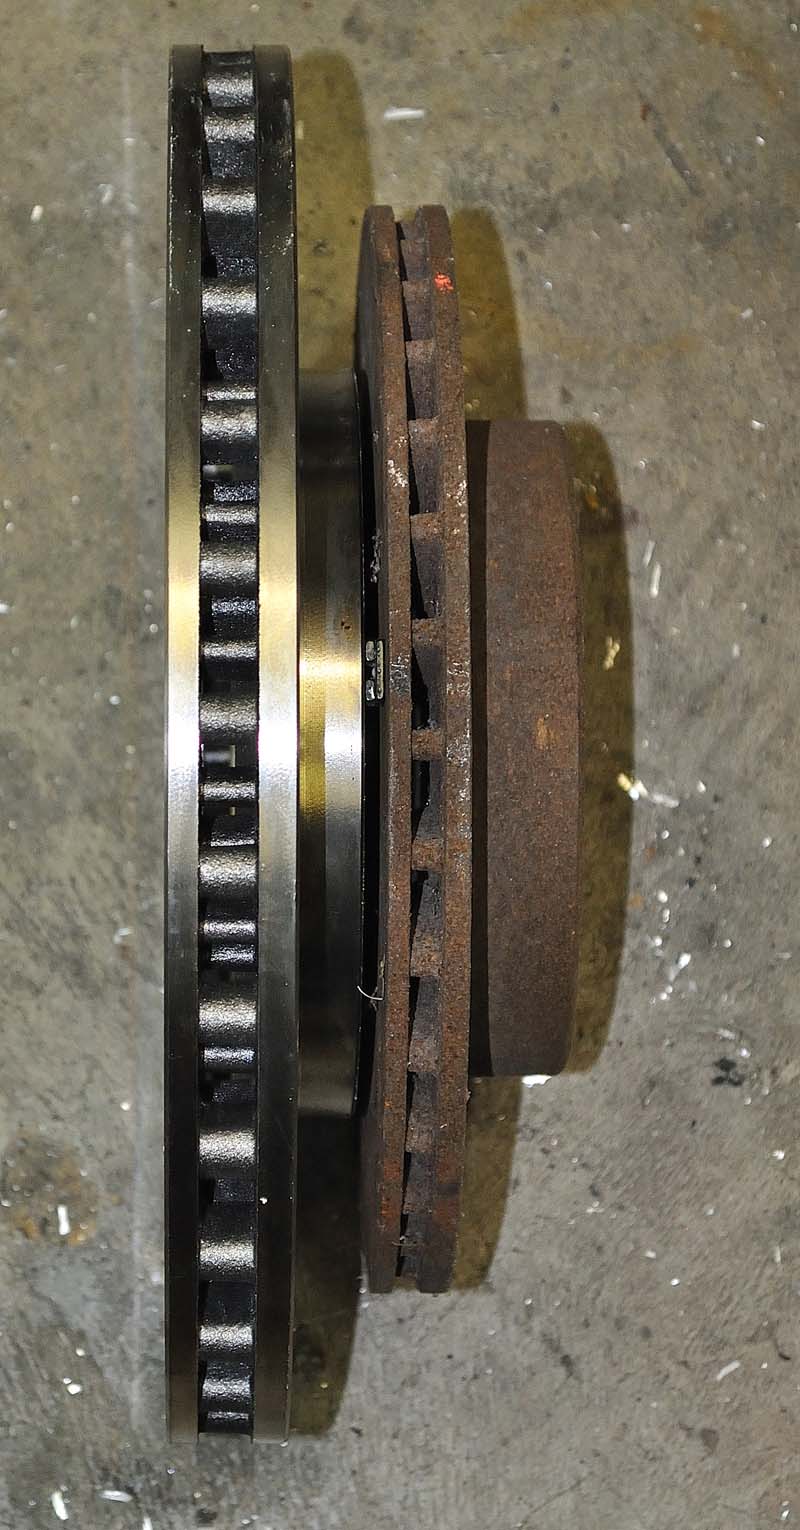
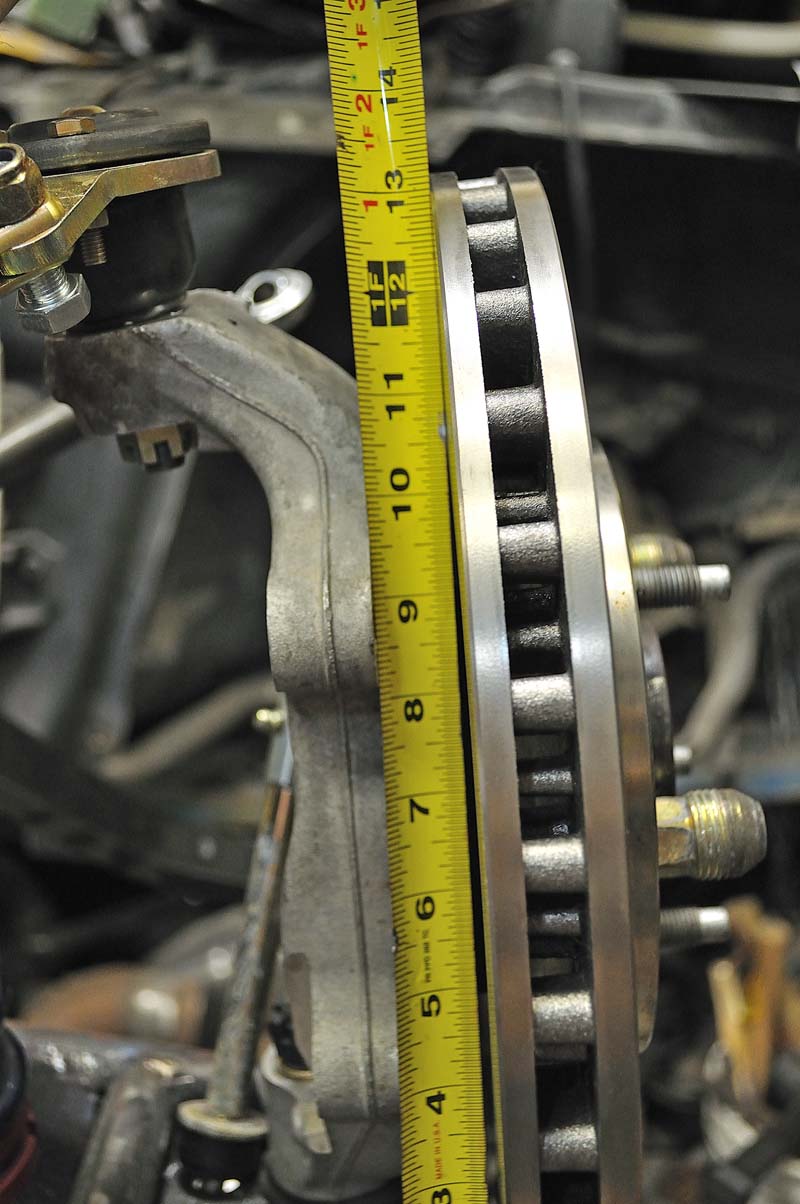
The 88 fiero rotor on top of the Mustang Cobra rotor.
The Ford rotor is 1.1 inches thick and has a real shallow offset.
Another real cool aspect of the Ford rotor is that its 13" in diameter and I can get them new for around $40 each! (cheap imports)
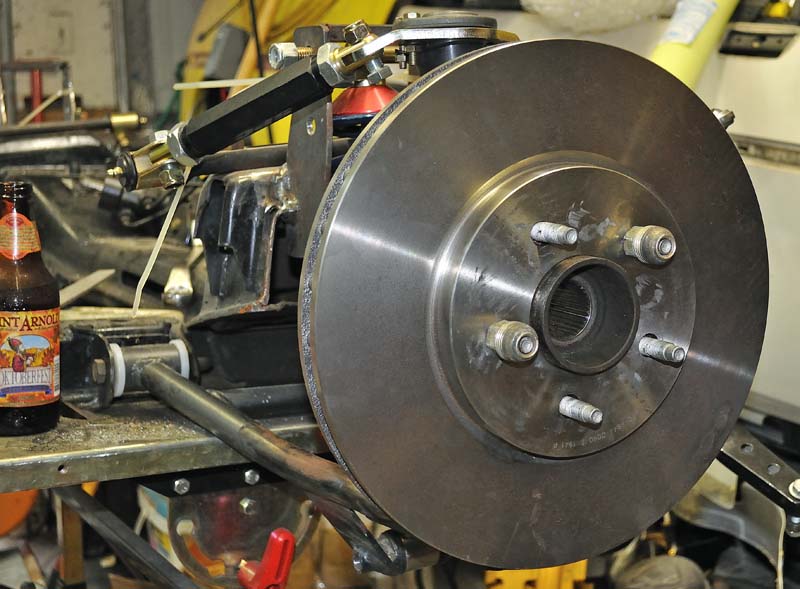
They fit like a glove on the new knuckle assemblies.
I'll still have to fab the brake caliper bracket back here.
The disc just bearly kisses the lower control arm pinicle but a few minutes with the angle grinder will fix that.
I still have to pick out a caliper, I'm still looking at the Ford Cobra unit or a Wilwood piece.
------------------ yellow 88 GT, not stock white 88 notchie, 4 banger
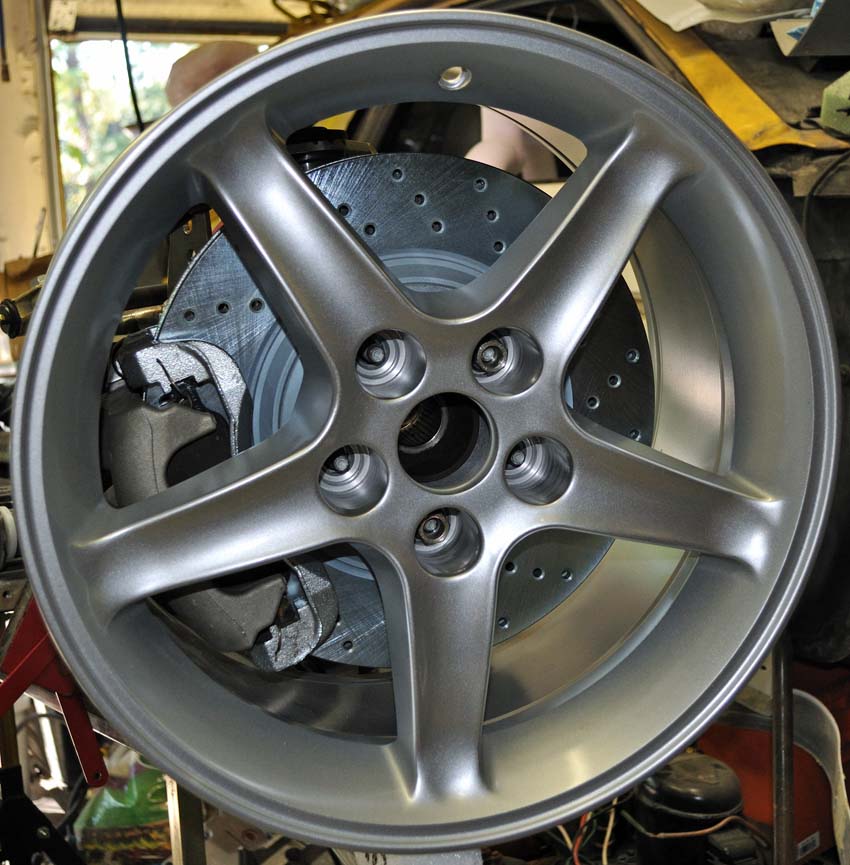
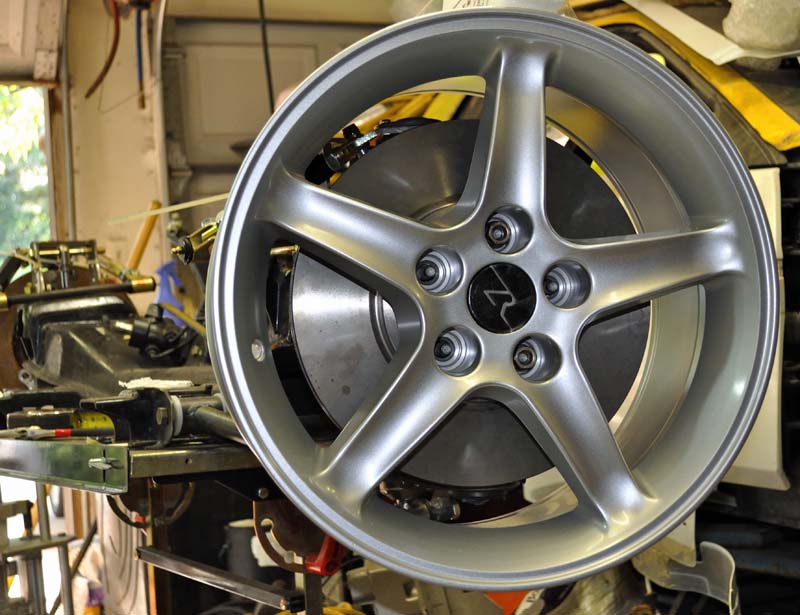
One of my favorite things is trying out rims for the first time. They can make or break the look of a car. This is an IMSA wide body car so it needs something to fill up the big fenders, and it had to be cheap.
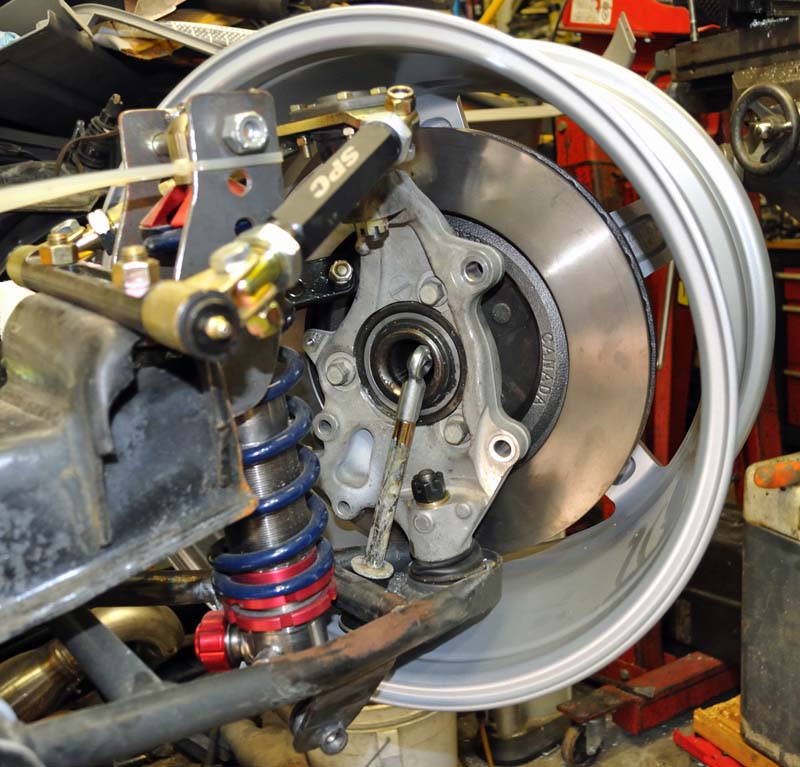
How about 17x9's for the front! (edit) This is what the power steering is for.
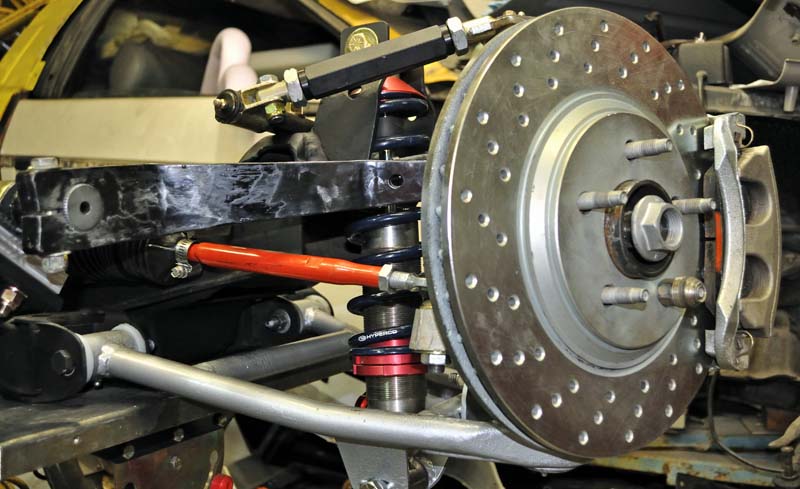
The solstice knuckle with the 13" rotor fits pretty good.
Upper ball joint has plenty of room.
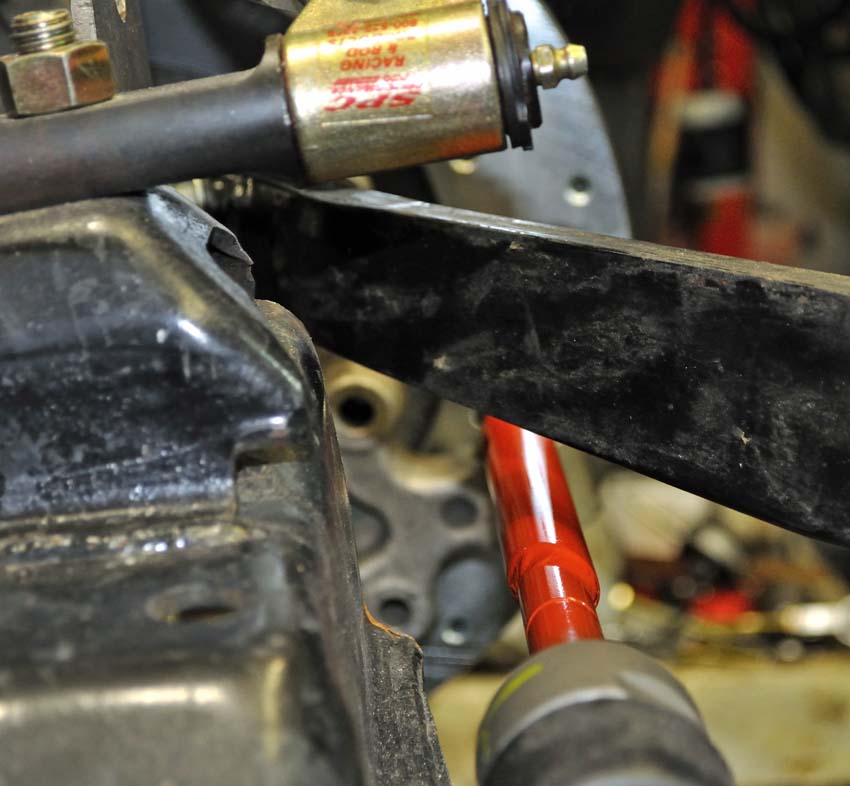
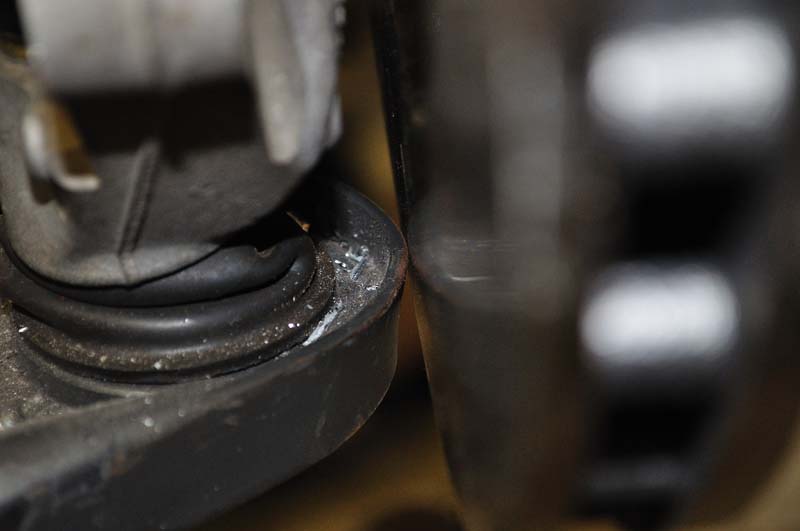
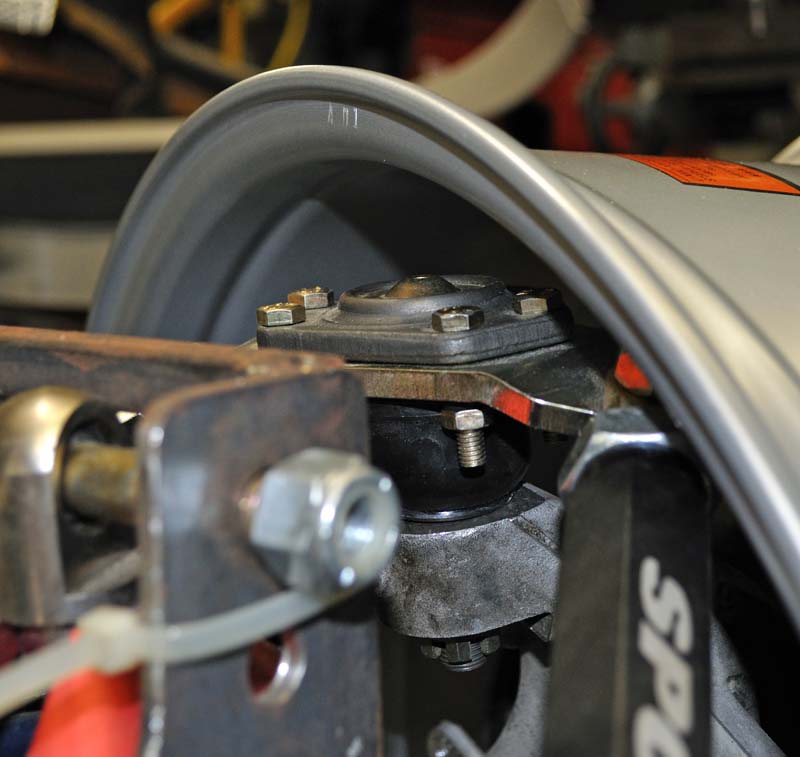
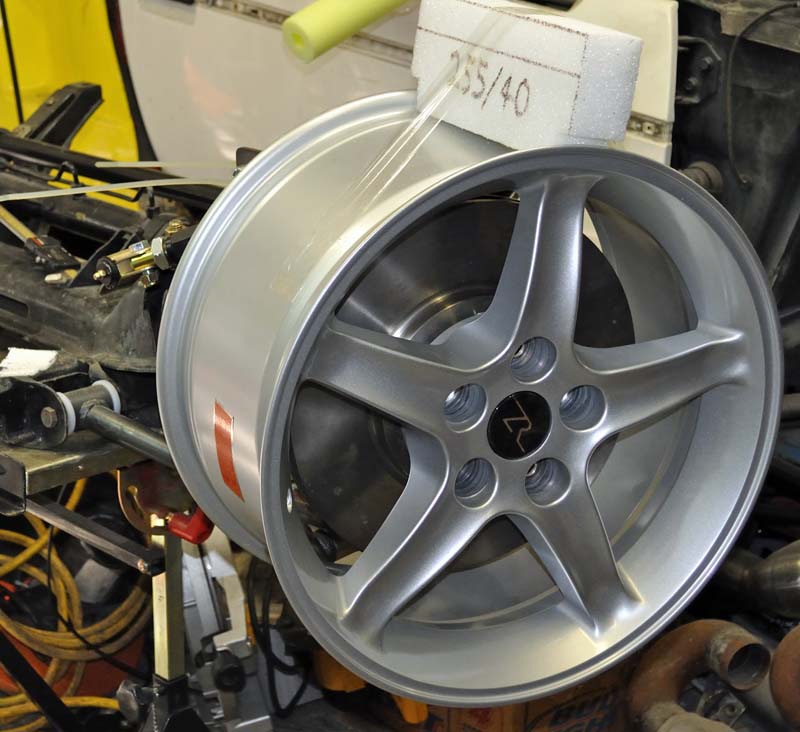
The trailing upper A-arm is close, I'll need to do a range of motion to check for problems.
There's about 1/4 to 3/8" room in there. The front end is almost at it's lowest point of travel.
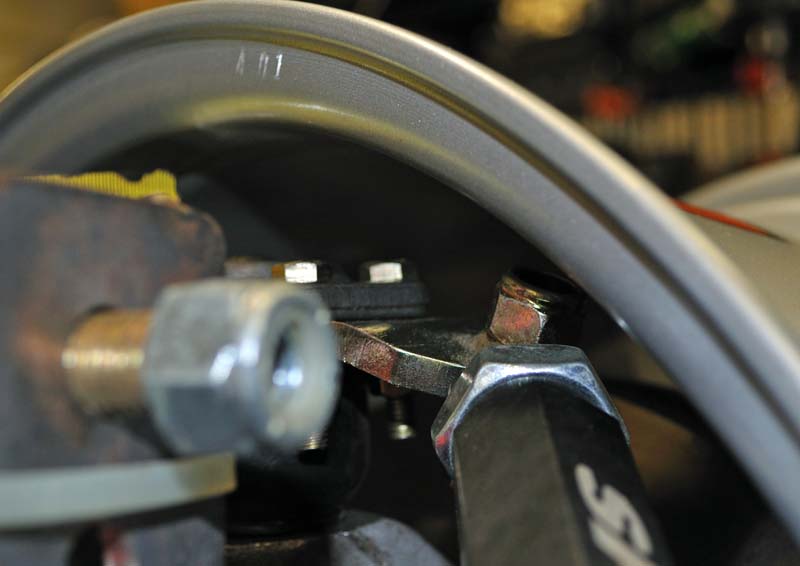
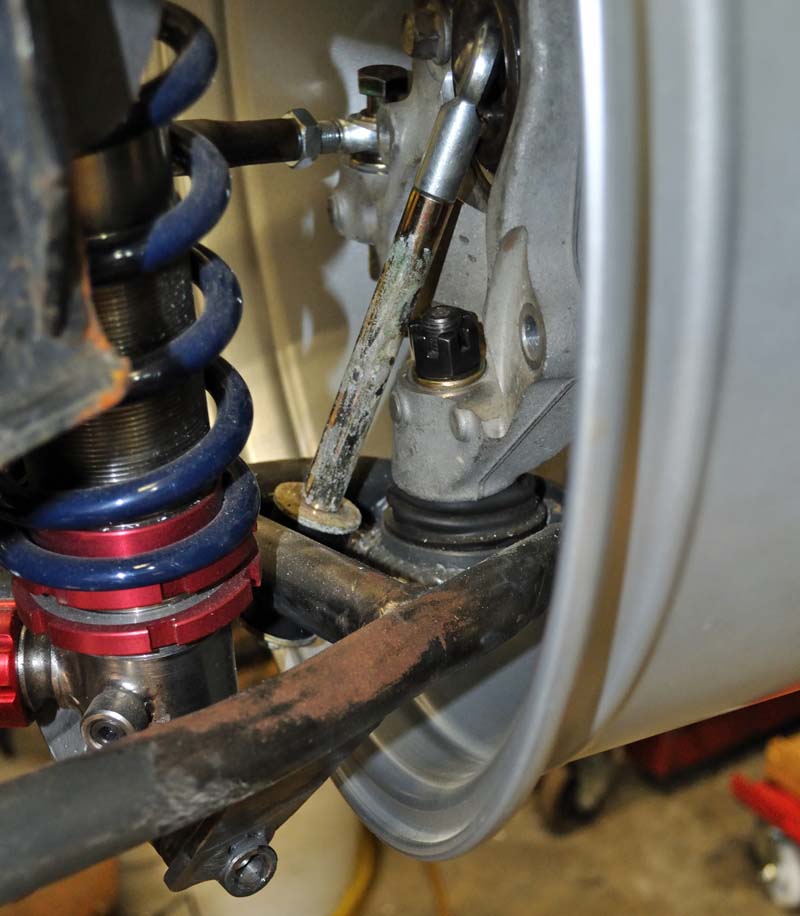
The lower ball joint has plenty of room. You can see the lower shock mount is about 1/2" lower then the wheel rim. This will need a good looking over.
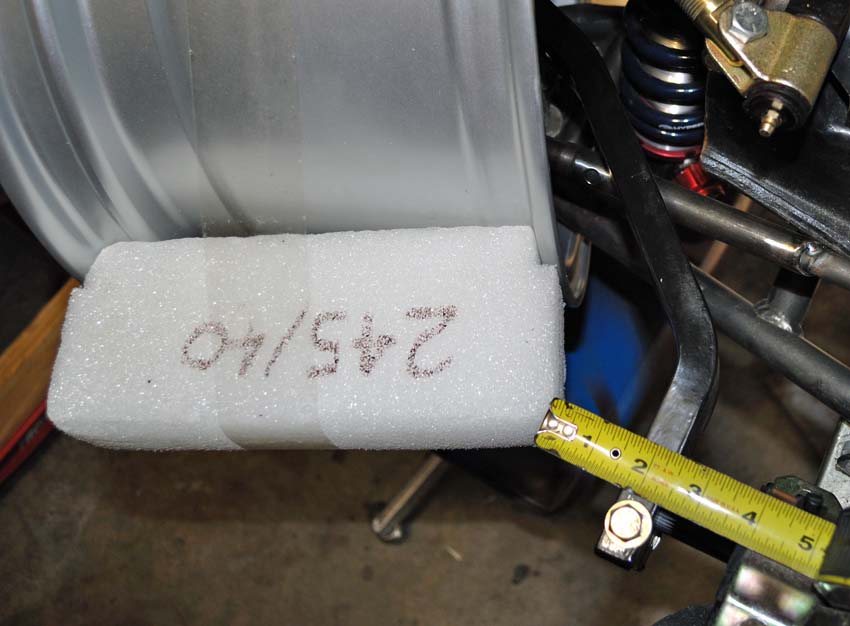
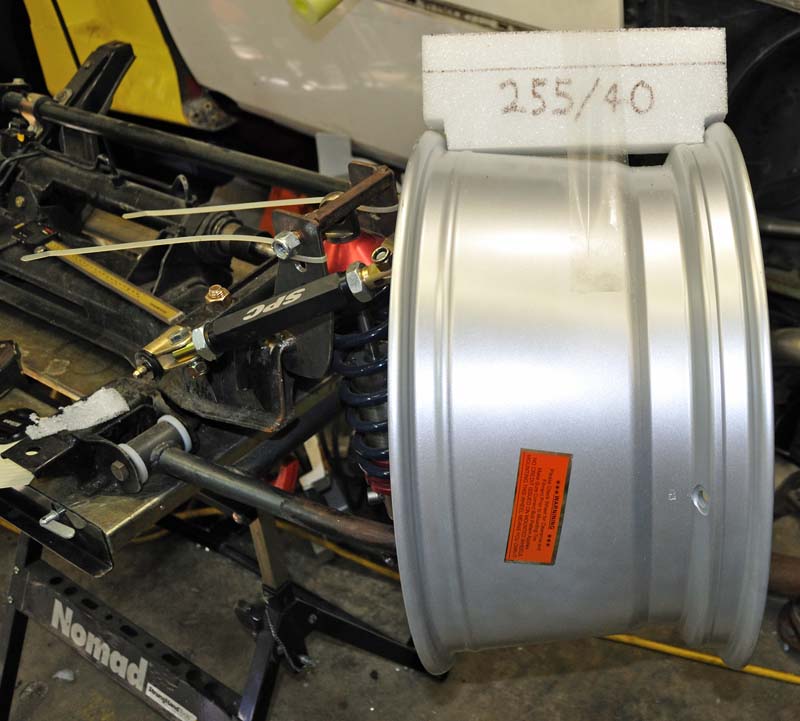
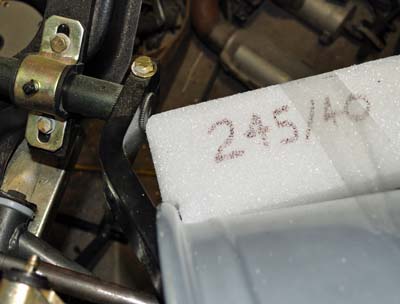
Max turn in with 255/40 tires will see some big time rubbing if I don't do something to limit steering or shorten the sway bar.
I need to add another 1/2" worth of stop to each side of the rack to keep the 255's off the sway bar ends.
If I go down to a 245/40 tire I can get away with only 1/8" more stop. It would also be a lighter and tighter wheel combo.
I like the nice clean looks of the Cobra R wheels, I need to get some measurements to see which calibers can fit inside with the 13" disc.
I can get these for the same price and they weigh about a pound less, I'm not yet sure if I would like the look on the car.
What do you guys think?
------------------ yellow 88 GT, not stock white 88 notchie, 4 banger
[This message has been edited by ccfiero350 (edited 09-24-2010).]
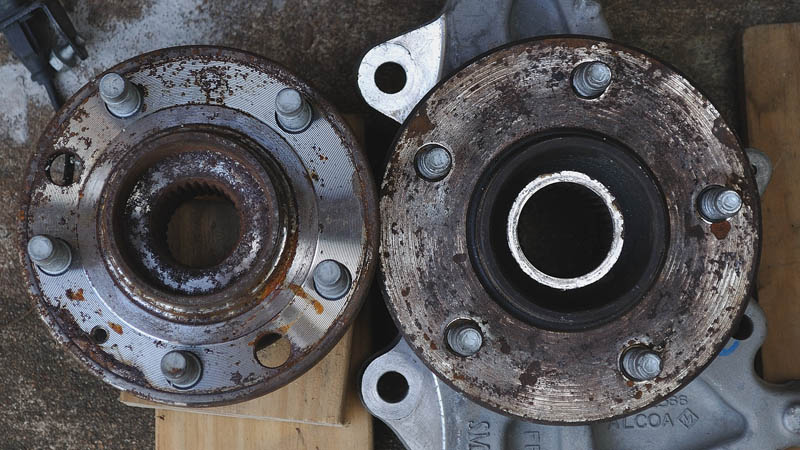
What are you going to use to hold the wheel bearing together? A lot of wheel bearing use the Axle to hold them to gether. I went down this path this year and was disappointed with my solutions a lot of wasted time and money. I tried machining some large bolds and washer to simulate the axles, but they just let the bearings have too much play in them. You may want to just cut up a set of axles. My solution was to use the front wheel bearings from a Cadilac CTS 2wd version. The ones I bought were 5 bolt on a 115 pattern. I believe the CTS-V has a 5 on 120 pattern but I don't know if it is 2WD OR 4WD. Maybe in future I will share my build pictures with the community, but I would like to get some track time on it first... Cheers, Mike
The Vue hubs are 2nd gen and still need the outside cv joint spline to provide the preload on the bearing and hold it together. It's a big bearing and the nut needs something like 125 ft/lbs of torque for preload. I plan on cutting off the cup of the outside cv joint and just use the spline side and torque it to specs. to hold it all together.
------------------ yellow 88 GT, not stock white 88 notchie, 4 banger
No, this tranny takes the same axle spline configuration as the F40, they are both originally Saab transmissions and more than likely the F35 has the same offsetting of the final drive carrier that calls for different length output axle stubs at the tranny, in other words you can't fully insert an axle shaft in the right side of the transmission so the jackshaft would be manditory.
Looking for a simpler and cheaper swap I am curios if late 90ies SAAB tubo engines/transmission be an alternative? Is it the same transmission match? The SAABs are easily chip tuned for a very low cost to 300hp/400+Nm and I believe that the ECMs are still stand alone units in those years. I guess there are other alternatives but without and potential axel match, Volvo 850/S70 T5 also produces 300hp with chip only and they look pretty good in their cradles…
Basically I assume most are looking for is • A standard engine that produce 300 hp without modifying engine • Lightweight • Available at low cost • Stock Stand alone ECM • Axel / Transmission match
The LSJ is a great option but pricey + expensive engine management
That said, it is always best to replicate a swap that has been made previously
GM did buy SAAB in 2000, I have no clue as to when they started sharing parts. I think GM looked into the Saab parts bin when they were coming up with the idea of making Hi-Po front wheel drives and they did not have a stout enough manual transmission in their own bin.
Most car companies do not make their own transmission so you can find getrags in Ford products too.
IMHO, axles are the last thing to worry about. There is always the safety net of just getting axles made to fit what your using. It's really not that expensive. You can save your time and energy for more important things like making brackets and solving fit issues. i think I've spent more then 40 man hours just looking and cross referencing axle and CV joint catalogs and bought a half dozen used axles figuring it out. In the end I'll probably still have to buy custom axles to get what I want.
------------------ yellow 88 GT, not stock white 88 notchie, 4 banger
I had been looking for a suitable brake caliber on and off for a few weeks. I really wanted to do a Wilwood or Brembo 4 or even a 6 puck radial mount piece. The cheapest new 6 puck Wilwood would have set me back about $385 per side with pads. 4 pucks would be about $230 per side.
Looking for used calipers on Ebay showed up a bunch of old tech stock car stuff, that would need re-built to use but all these units were HUGE and would not fit my offset.
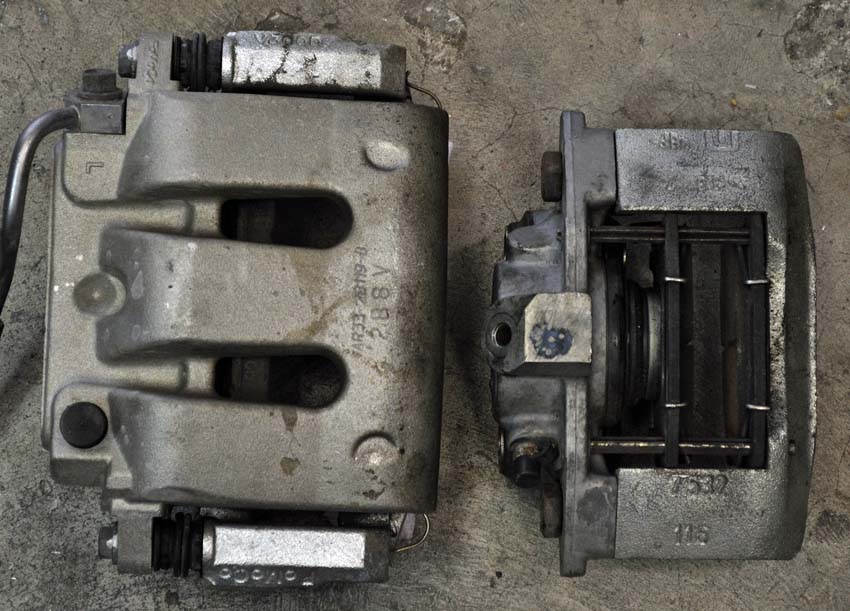
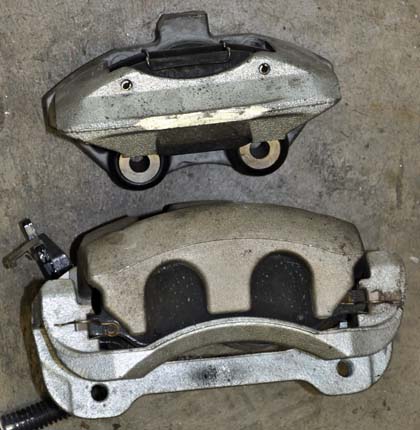
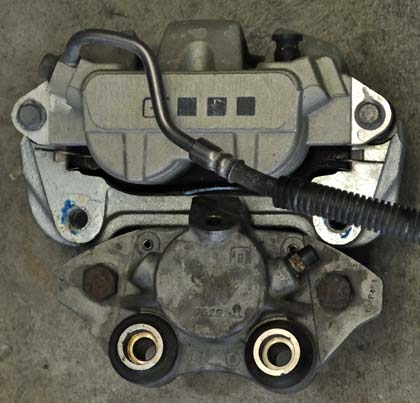
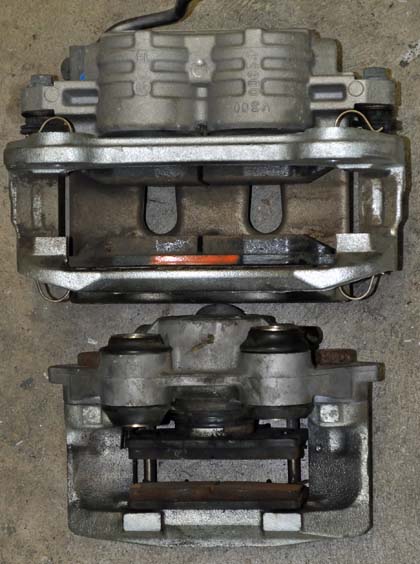
What I did find was a pair of take offs from a 2010 Mustang GT for $75 that included pads and hardware!
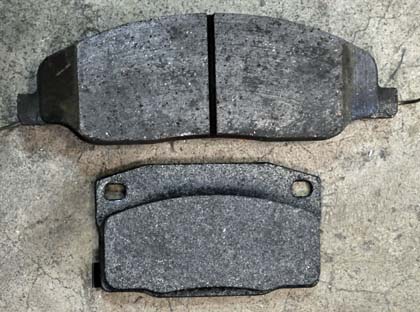
The Ford units are about twice the size of the stock 88 pieces and weigh about the same.
The 2 main benefits from big calipers is, More clamping force and more friction area
The Mustang calipers from 2005 to present are the same for the base and GT cars, they do have different brackets to fit the small and medium rotors. There is a bigger caliper to fit the 14" GT500 and other upgrade brakes. I'm using 94-2004 13"Cobra rotors as they have the right amount of offset and the combination fits inside a 17" wheel.
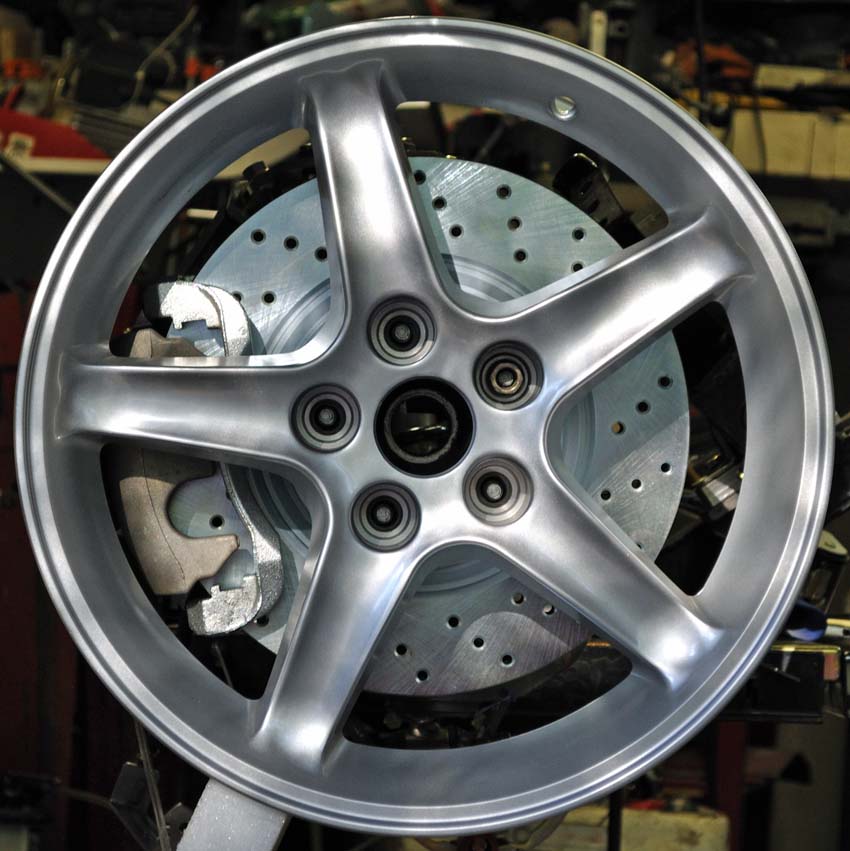
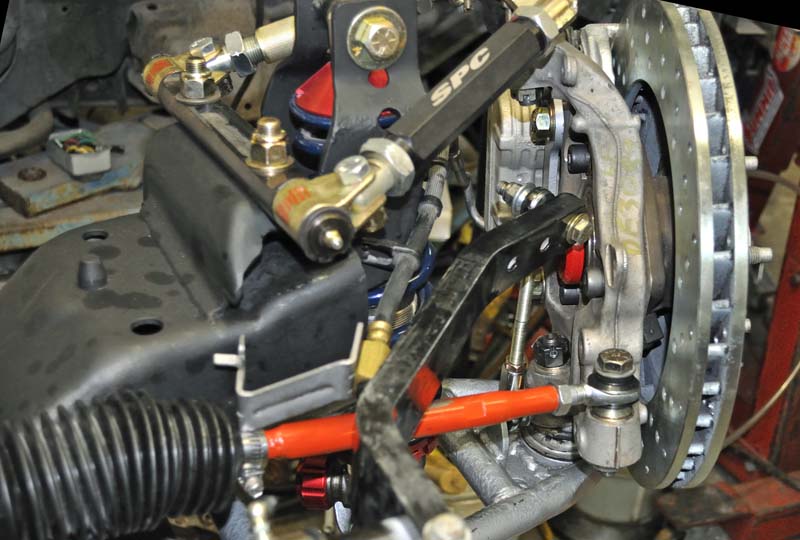
This shot shows the wheel at full lock and plenty of clearance behind the caliper.
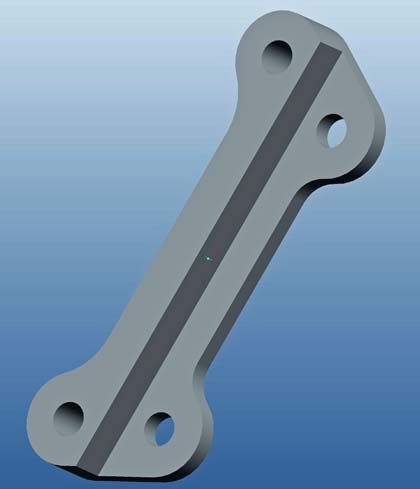
I've designed the adapter bracket and will send it off to be machined this week.
One of the good things about the Cobra rotor is that you can get them cheap on ebay, these pair of drilled and zinc coated cost less then a single lowest grade part at Nappa. When it comes time to upgrade to a 2-piece rotor I can do it for under $250 per rotor.
------------------ yellow 88 GT, not stock white 88 notchie, 4 banger
Very nice progress, those calipers look very similar to the Lincoln continental calipers I grabbed from the wrecker a long time ago. I've been tossing around the same problem as you for a while as well, although I got somebody local that has some Brembo 4 pistons that I am going to be looking at, he says they will fit the corvette rotors that I have laying around.
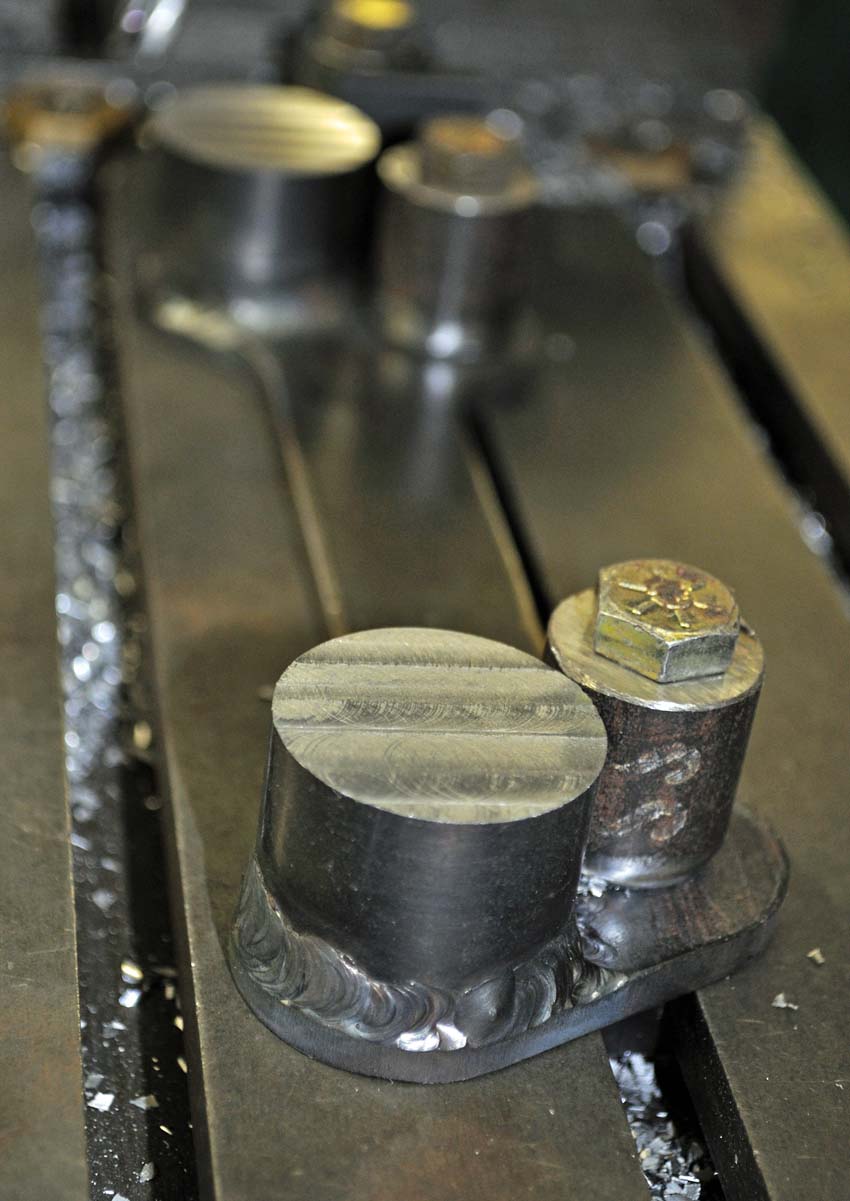
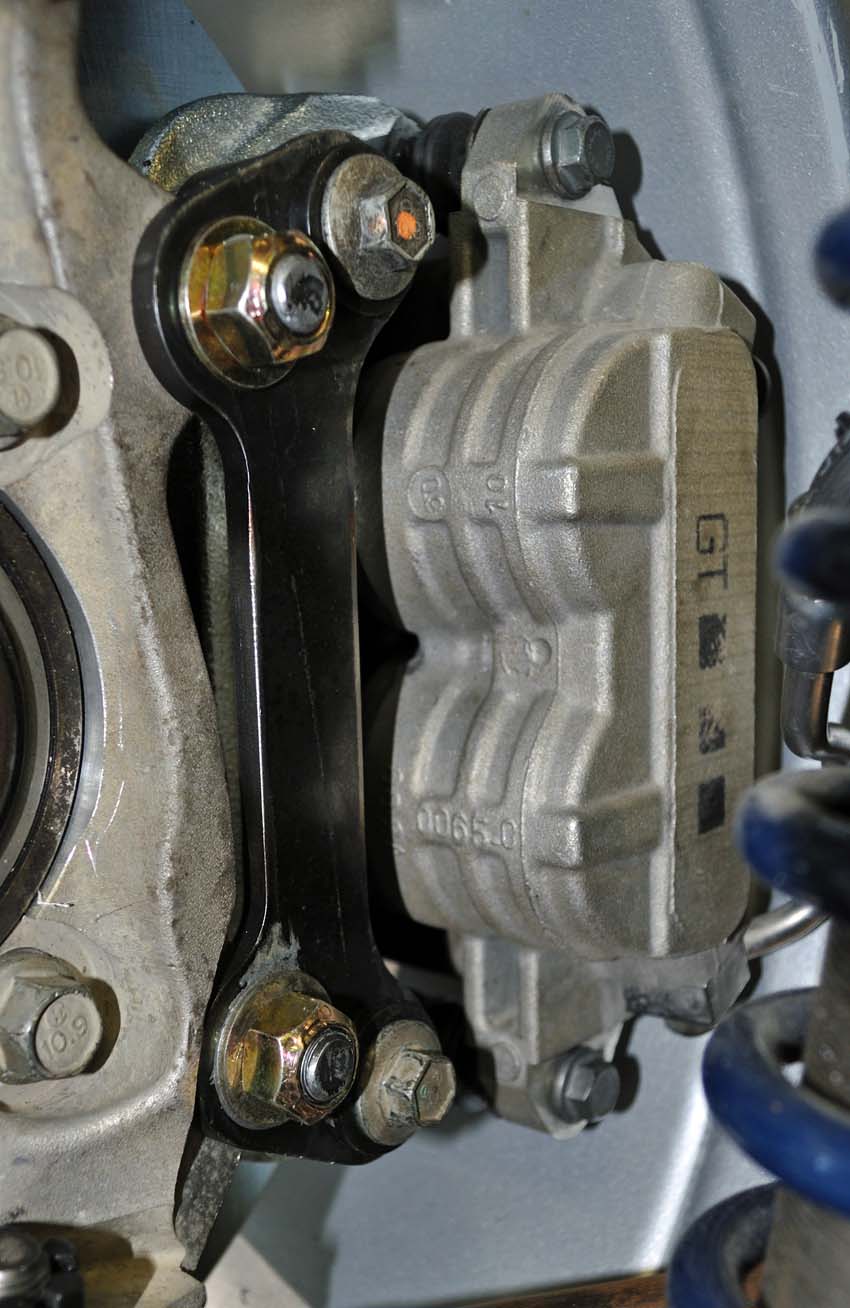
I had originally was going to make he caliper adapters out of aluminum but the quotes I got back were out of site. So I decided to have the net shape water jet from 1/4" steel plate and make some standoffs and weld them together.
I cut and squared one side of a 1 1/2 solid round to 1" long and welded to the bracket. Then I machined them to the correct assembled thickness.
So now they are the correct thickness and square to the mounting face.
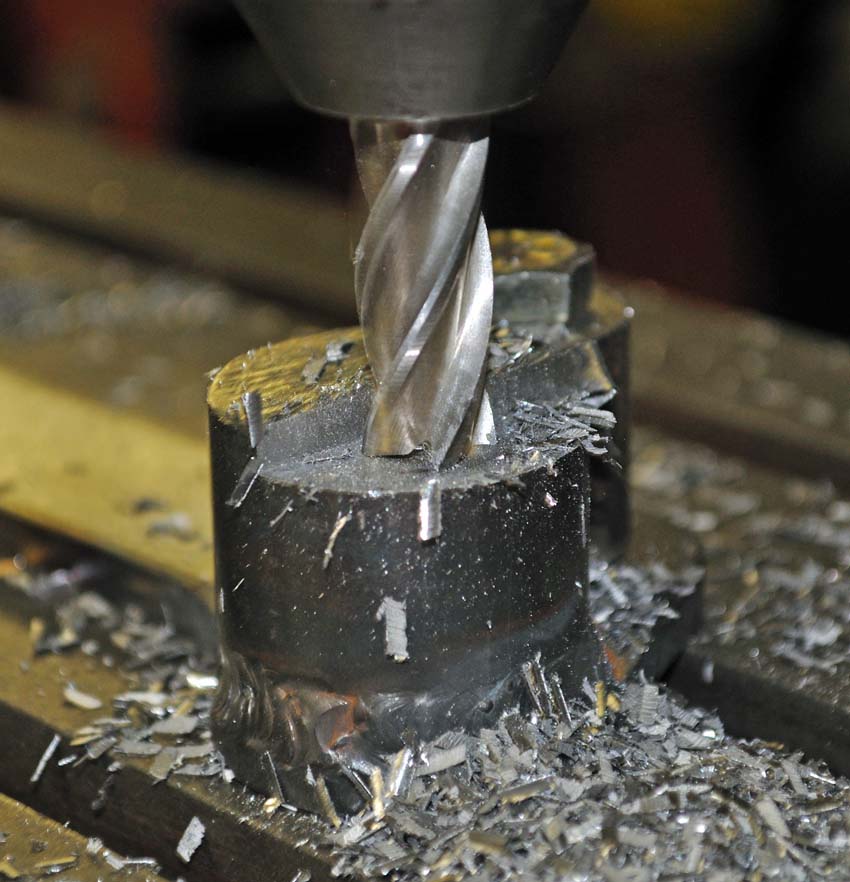
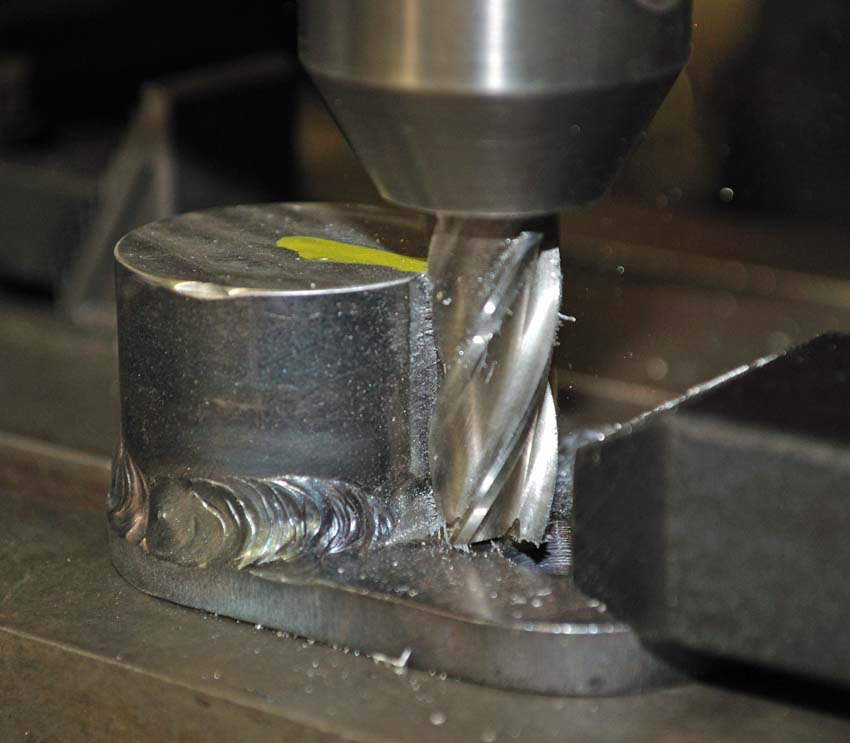
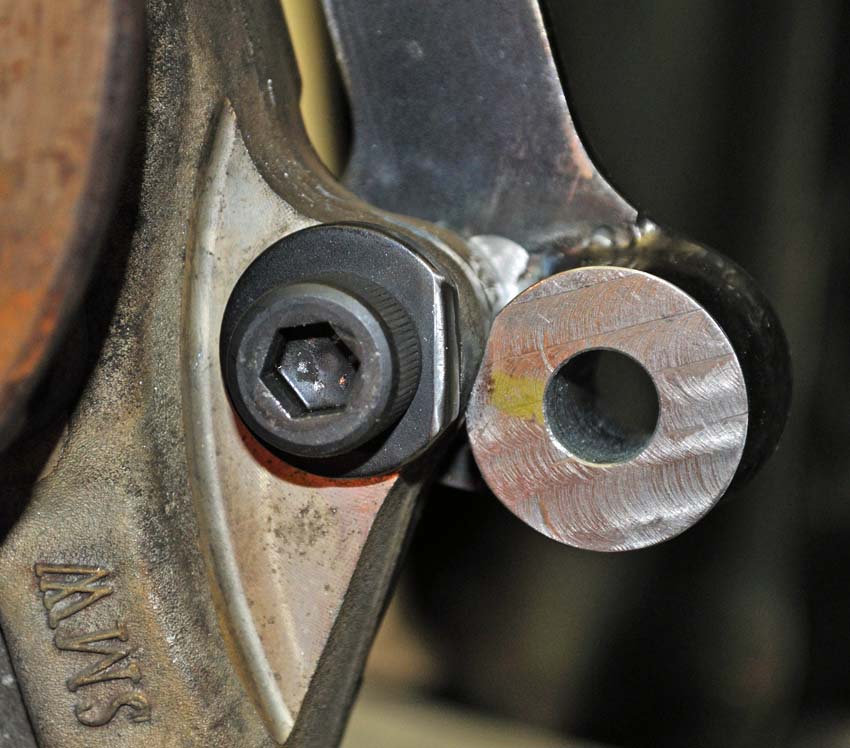
Test fitting showed I needed to spot face one side of the cylindrical standoff to make room for the aluminum ears of the knuckle.
So I took a little off the side.
I want to leave as much original aluminum as possible to make it as rigid as possible.
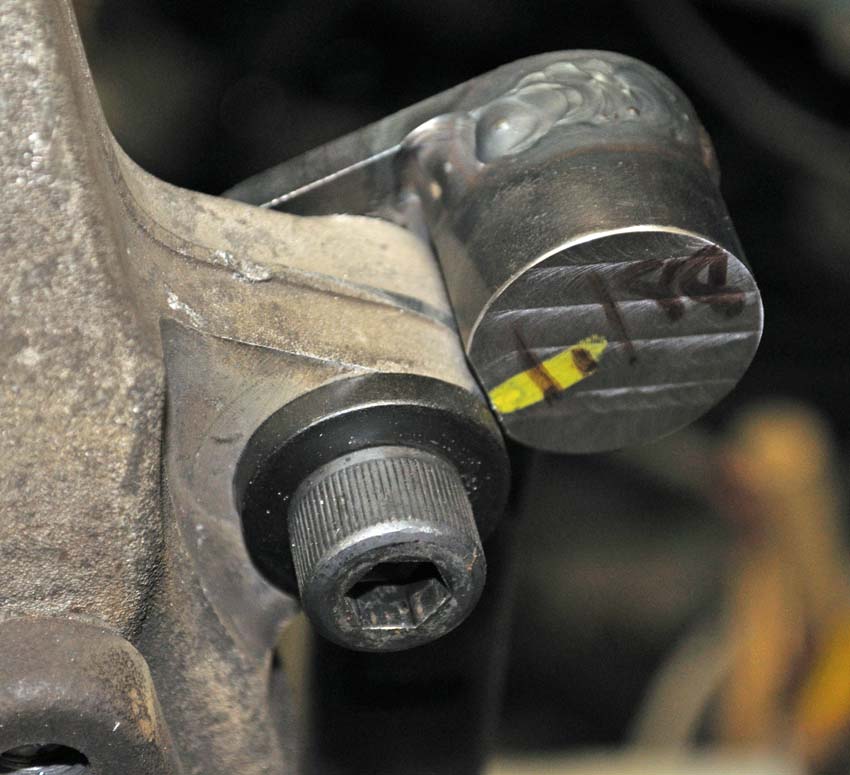
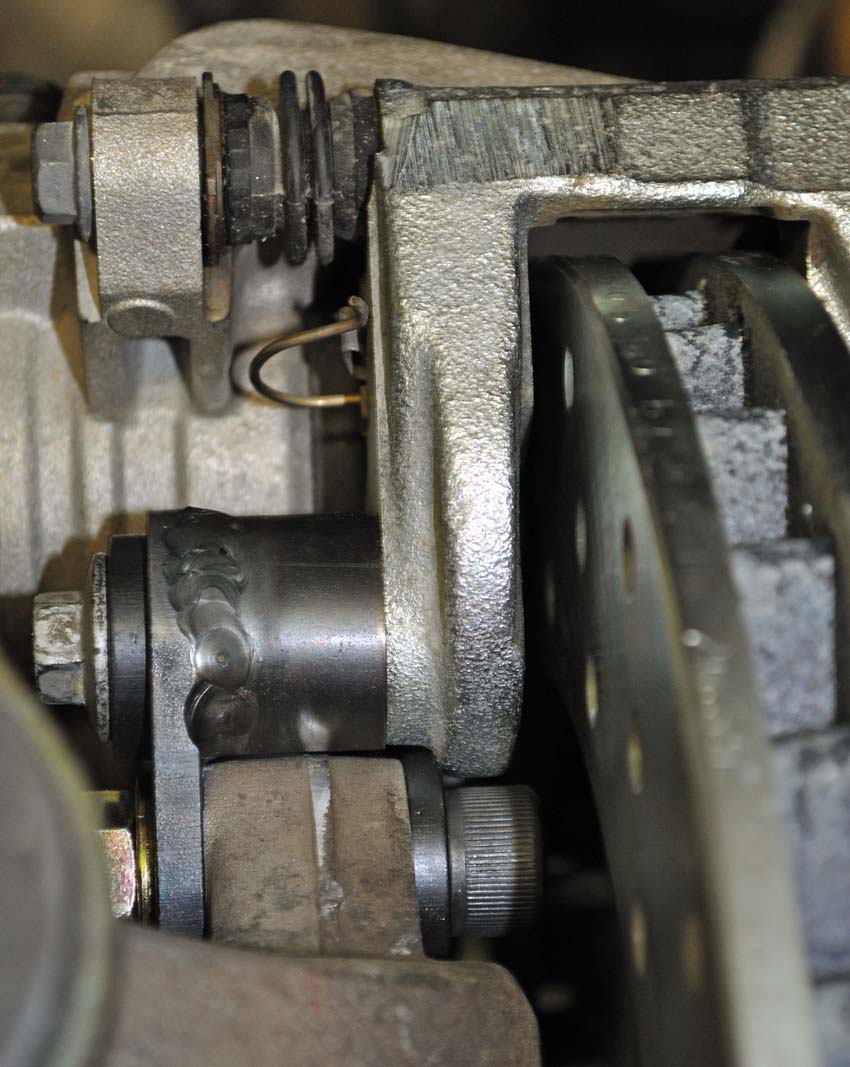
The lower washer needs to be clearanced to make room for the cast iron caliper bracket.
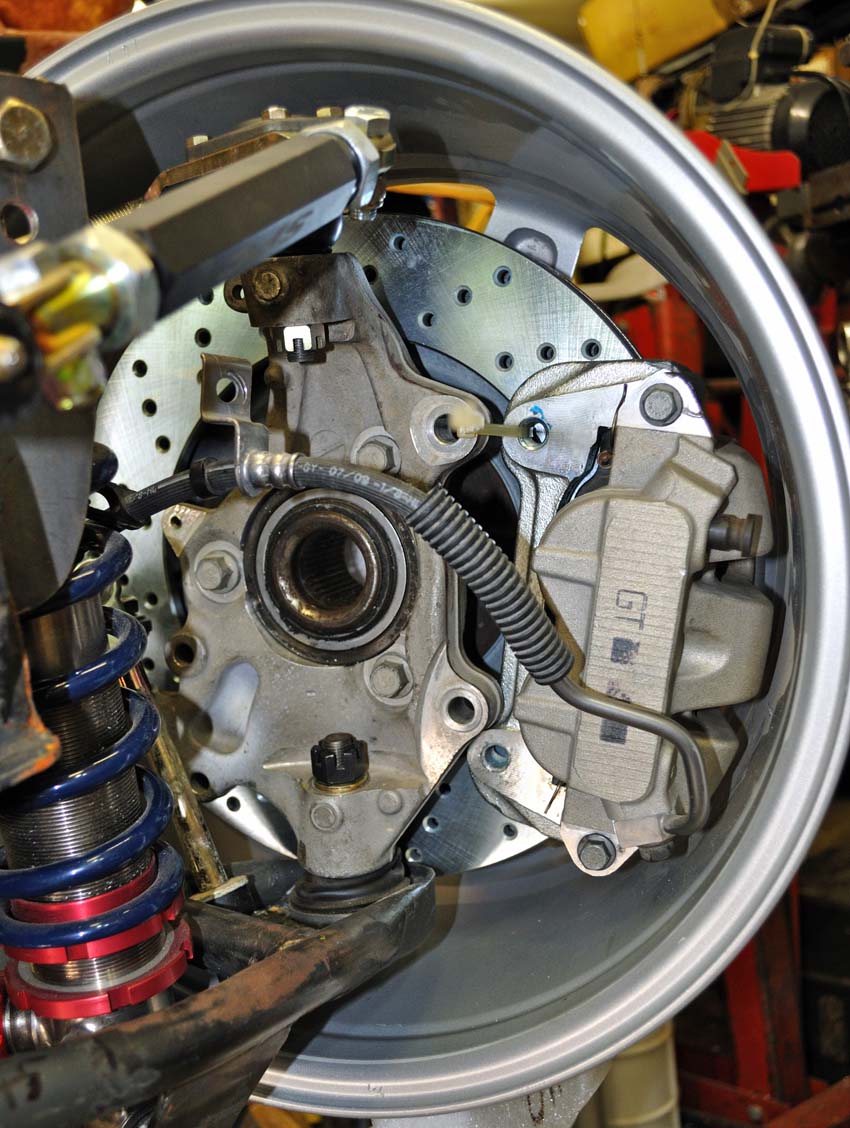
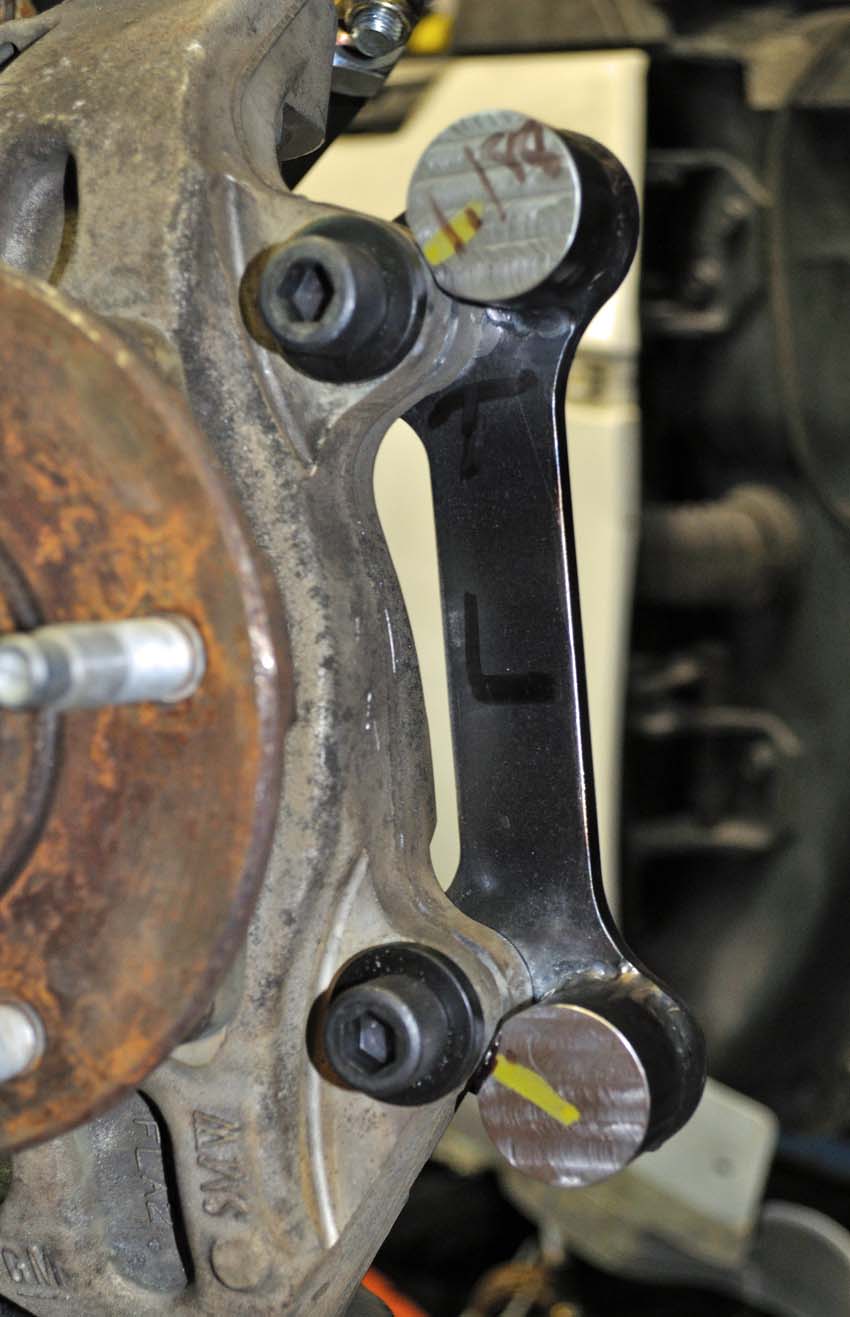
With the caliper mounted you can see how the cast bracket closely follows the bolt and washer of the adapter. The lower one needed the additional clearance.
The back side of the adapter shows the stock 10.9 bolts and the 1/8" thick harden washer for the caliper brackets and the new 1/2-20 socket head bolts and lock nuts with grade 8 washers for the adapter. I used the thick washers to keep the 10.9's bolt ends away from the rotor's inside surface.
So all bolted together it fits inside the stock 17" mustang wheel.
------------------ yellow 88 GT, not stock white 88 notchie, 4 banger
Very tight fit, I like the bracket, should hold tight like tiger.
Glad to see some progress on your beast, I would post up some pics of my intake, but I am going to have to send it out to a guy a know to work on the alum welding........I just don't trust what I have done.
All I have left to do on the front end is fab the sway bar linkages, bend the top shock mounts into place, flip it over and weld up some spots, then take it all apart and paint it.
And of course install in on the car.
I have some aluminum duct work that I want to do. I'm going to have to practice my aluminum welding a lot before hand.
------------------ yellow 88 GT, not stock white 88 notchie, 4 banger
What are you going to use to hold the wheel bearing together? A lot of wheel bearing use the Axle to hold them to gether. I went down this path this year and was disappointed with my solutions a lot of wasted time and money. I tried machining some large bolds and washer to simulate the axles, but they just let the bearings have too much play in them. You may want to just cut up a set of axles. Cheers, Mike
Yup, that was I going to do,,, did.
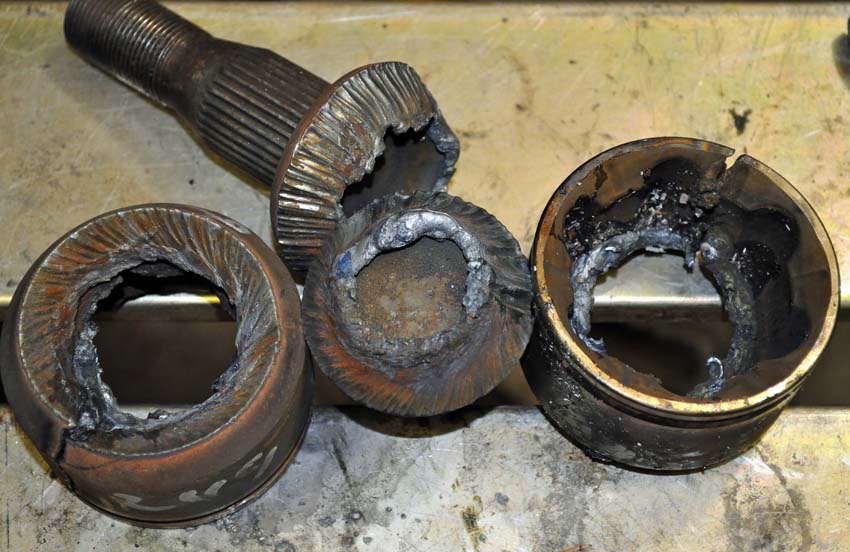
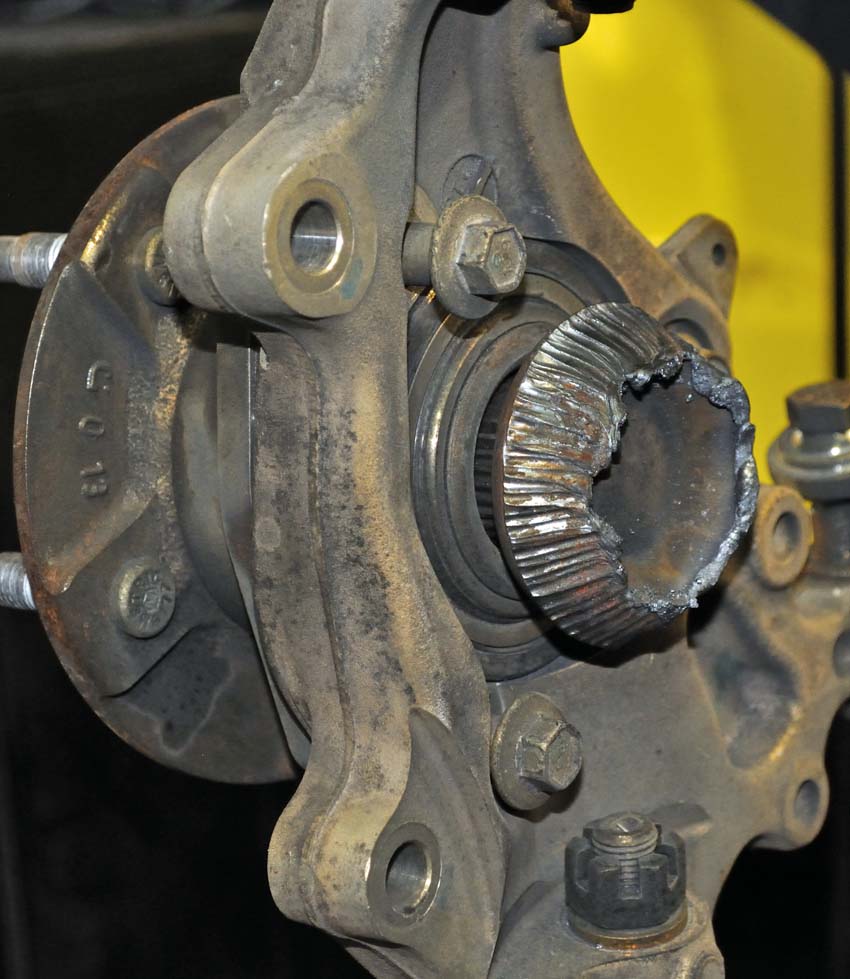
Got out my trusty big daddy plasma cutter and cut the cups off a couple of Vue outer CV cups.
I did'nt want that big anus looking knob on the insides of my knuckles, so I needed a little Klingon trimming.
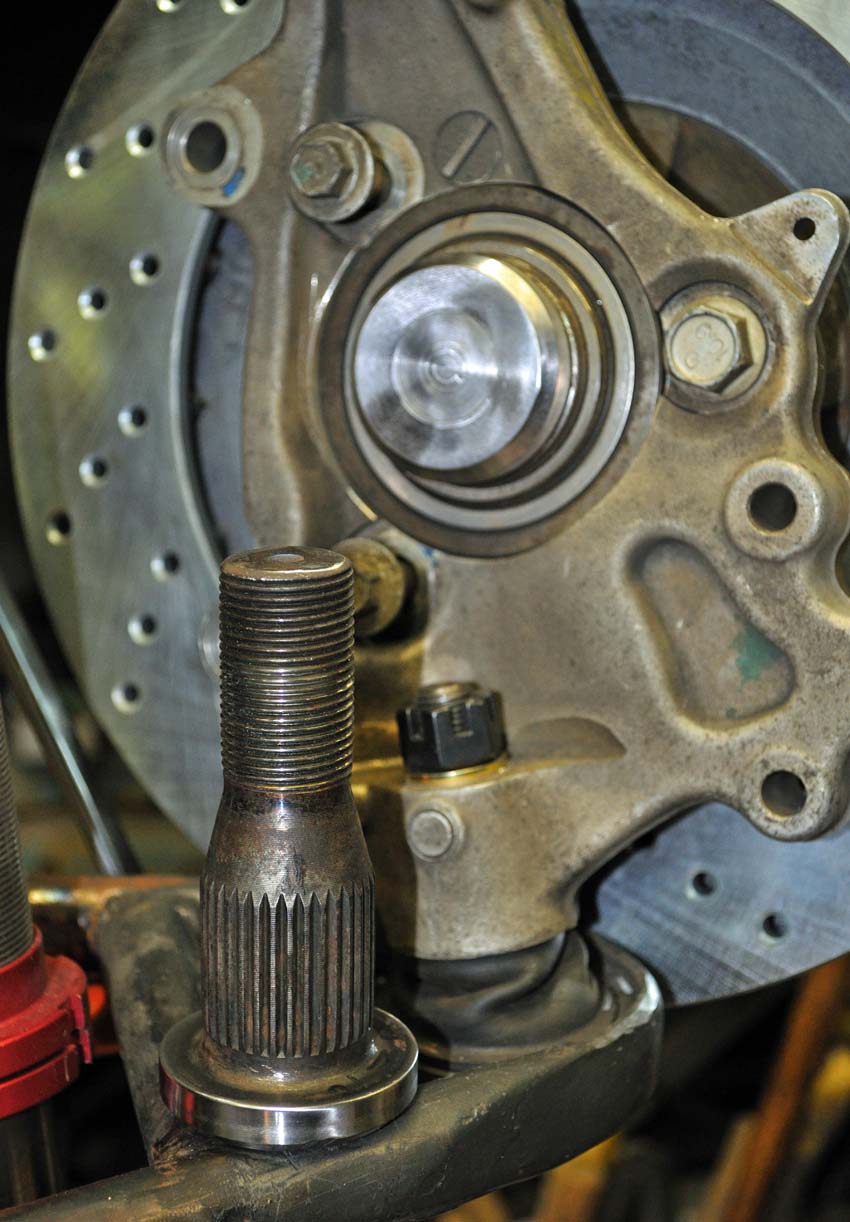
Much better. If anybody else does this take a bit of advice. The spline cups are case harden and the plasma cut does not effect the hardness of the metal beyond a few mills from the cut surface. So when I had these turned down the machinist had to go through interrupted cuts from the hard, brittle plasma cut surface to the case harden material underneath. It took a lot of time. It would have been easier to grind them down rather then machining after cutting them off.
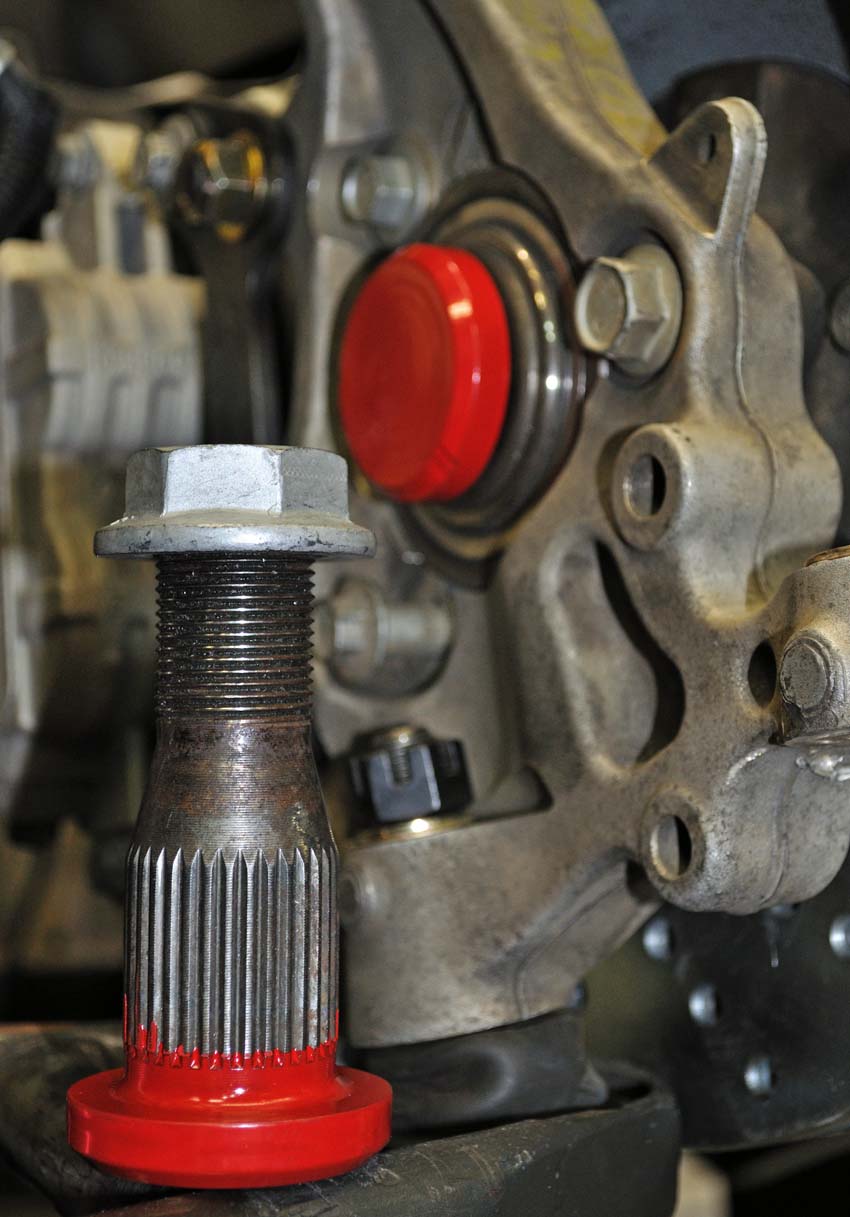
Painted them up and will torque down the hub bearing to the OEM spec of 151 ft lbs.
------------------ yellow 88 GT, not stock white 88 notchie, 4 banger
Max turn in with 255/40 tires will see some big time rubbing if I don't do something to limit steering or shorten the sway bar.
I need to add another 1/2" worth of stop to each side of the rack to keep the 255's off the sway bar ends.
If I go down to a 245/40 tire I can get away with only 1/8" more stop. It would also be a lighter and tighter wheel combo.
I really did not want to limit the steering anymore then it is. The stops are the corvette units. So I went with a s 1 1/2" shorter sway bar then what R Runner ships for 88's https://www.fiero.nl/forum/Forum4/HTML/036556.html
With the short bar in the 245's tires have room to breath at full lock. I have some worries about the rest of the fender well when this is install the car.
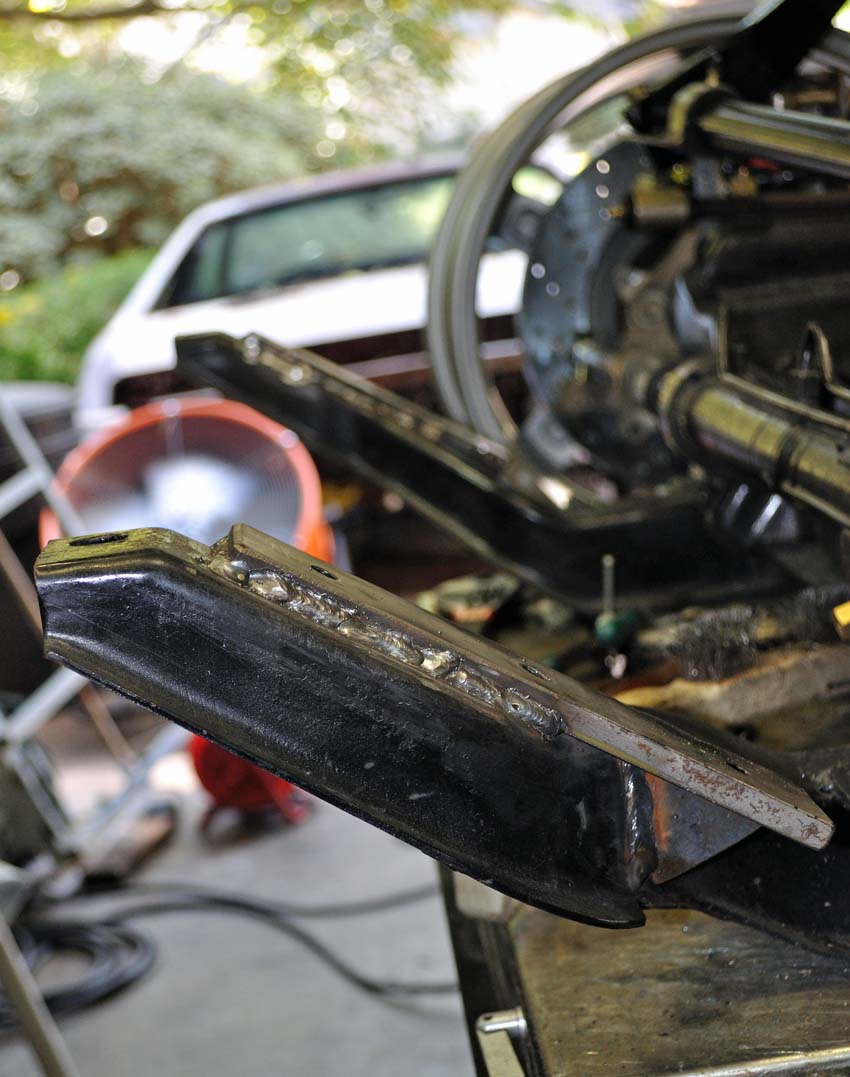
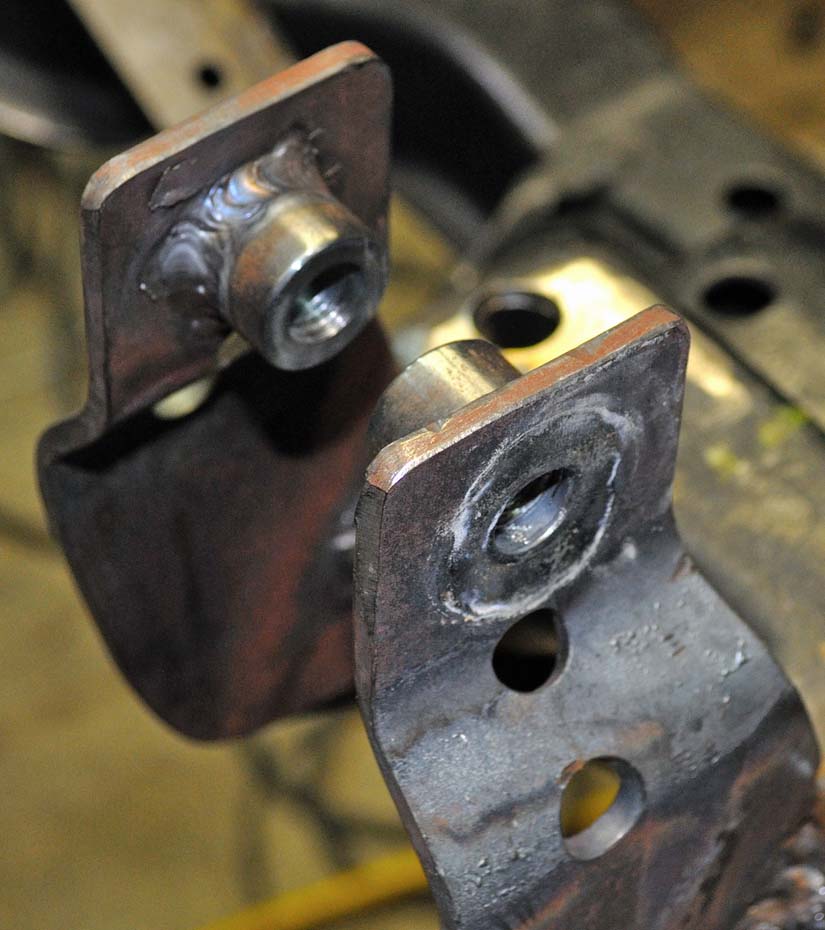
Another enhancement I applied to R Runners excellent kit was welding the adapter spacer plates in to stiffen up the front part of the sub-frame
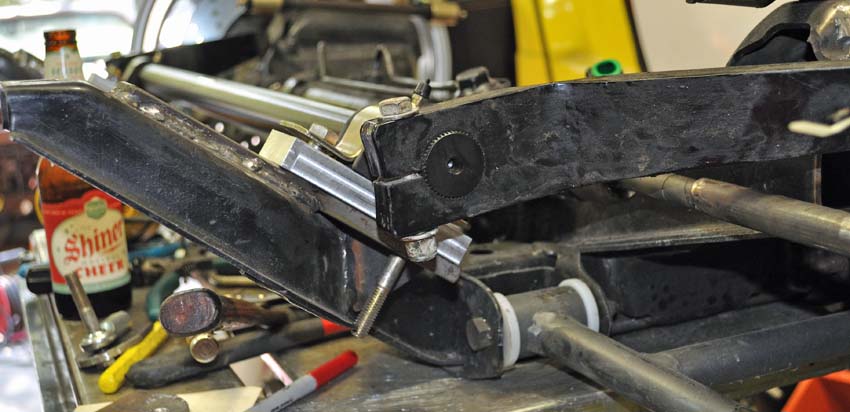
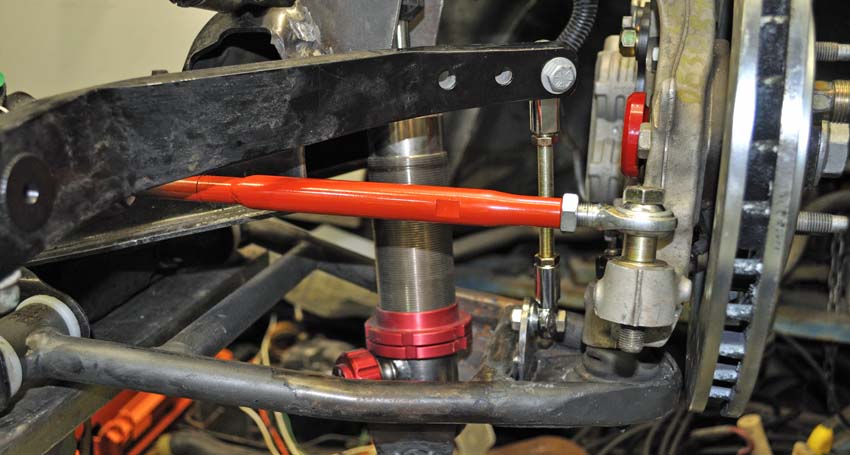
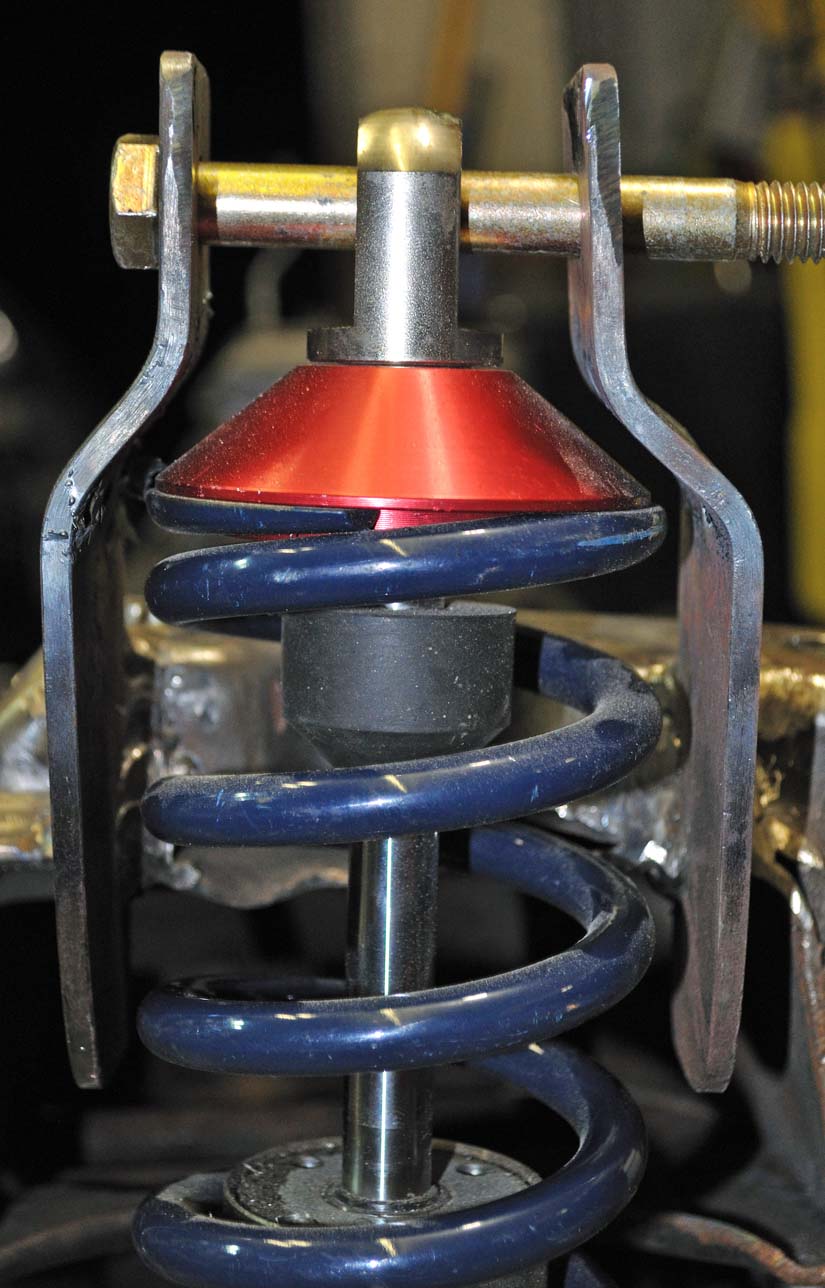
I added a little brace for the over hang. Also in view is the 5/8" aluminum spacer to bring the bar up a tad to help clear the steering links.
I welded in a new vertical tab to mount the other side of the sway bar link.
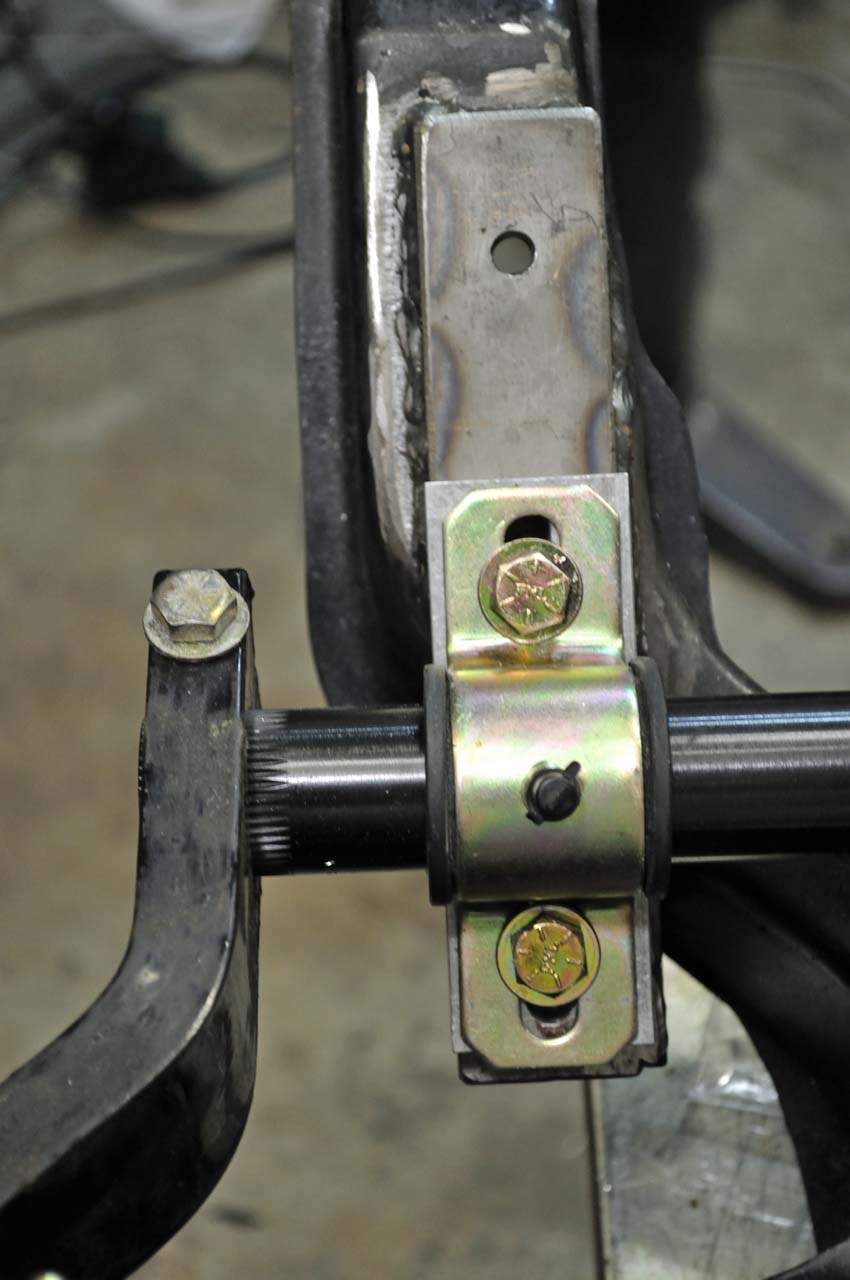
With the shorter bar, the arm ends stay out of the way of the knuckle and line up strait up and down on the softest position. As I move the linkages inboard I can swap sides on the the lower mount and get a 1/2 step adjustment. Also these linkages have left and right handed threaded rod ends so I can adjust left and right pre-load of the sway bar for different tracks and vehicular loads (me alone or with a passenger, it really makes a difference at the edge)
I have about 3/4" clearance between the sway bar arm and the steering linkage.
Over all I'm very pleased how the fit came out with the Vue hubs.
------------------ yellow 88 GT, not stock white 88 notchie, 4 banger
Damn very sweet setup, hope mine goes as well as yours.
Watch out for your endlinks though, I've used similar ones in my old ION redline for the front swaybar links, road contaminants, water and wear can cause the links to get loose and start rattling/clunking around, personally I will never use them on something that isn't 100% track only that didn't get examined after every race.
I hear what your saying, I got rod end cup seals on order to help keep the trash out a little longer. I looked at these http://www.powergridinc.com/swaybar.asp but they are asking $155 for a pair. I did both ends of the car for $80. They would be the best choice for all weather links. 1/4 of the time I do HPDE's it's raining here.
------------------ yellow 88 GT, not stock white 88 notchie, 4 banger
[This message has been edited by ccfiero350 (edited 11-02-2010).]
Those are some nice links, but they are closer in design to a ball joint than a rod end........maybe I am just sour but I've had so many cheap rod ends and expensive rod ends stretch out and cause more problems than they are worth, personally I am just sticking to prothane bushings and ball joint on my build just to stay away from problems that I had on other cars.
Once I get this thing back on the track and find out that I'm popping 3/8" rod ends, I can bump it up to 1/2" chromolies if need be. I got so much in front of me I need to to check some boxes as done and get to the next item on the list or I'll never finish this this car.
------------------ yellow 88 GT, not stock white 88 notchie, 4 banger
Nice documentation on this build, its really interesting!
With the new set up, I know you mentioned you can adjust for bump steer, but have you drawn up any linkage diagrams of your geometry to see where your roll center is, and instantaneous centers, etc for the new combination of parts?
I have not done a full blown study of this front end verses the stock 88. It all started out as a means to get away from the 88 hub bearing and some get some bigger brakes. I would have stayed with the 110mm bolt pattern of the solstice if there were some cheap wide wheels available.
I did add much more camber gain then stock and the scrub radius is a little less. I have not settled on a ride height yet, but it will be in the range of 4" to 6" measured from the center of the transom.
------------------ yellow 88 GT, not stock white 88 notchie, 4 banger
ccfiero350, quick question for you, are you going to be using meth injection on your supercharger? If so do you have a kit already? If not I have a supercharger spacer plate with two 1/8NPT ports that you can install meth nozzles and piping. I used it on my ION redline, but since my project is going with a turbo I couldn't use the plate. Currently its sitting in my basement with no plans for the plate, if you want it........its yours.
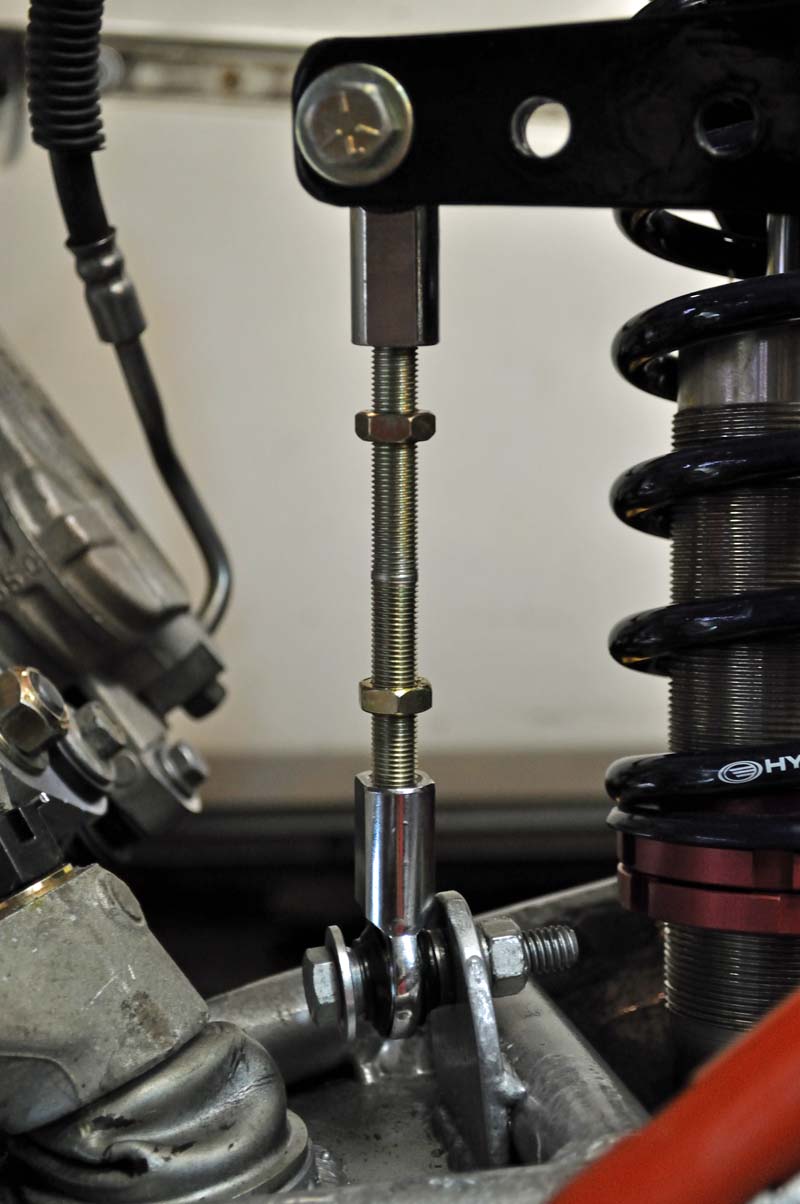
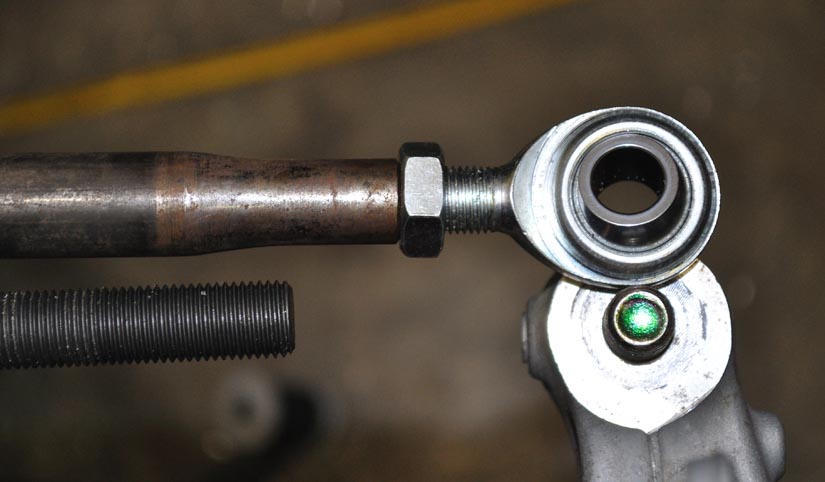
I had been waiting a while for the rod end seals to show up so I could finish putting together the front end.
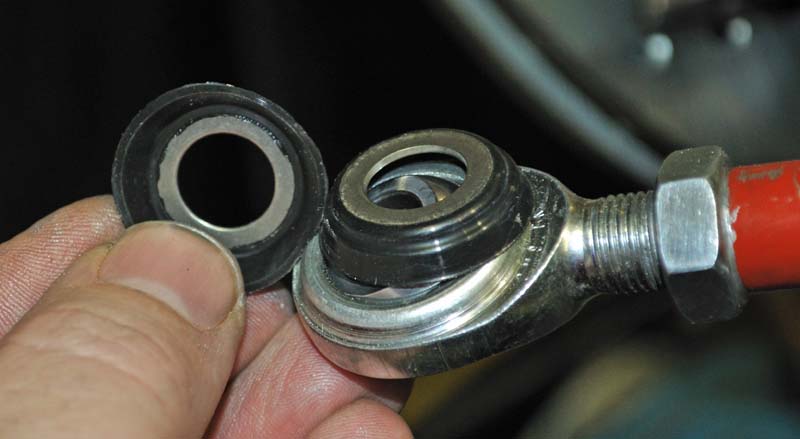
These rod ends are your typical two piece metal to metal unit. Once they get gritted up, they stick, then wear out fast. These rubber seals will greatly extend the working life of any rod end.
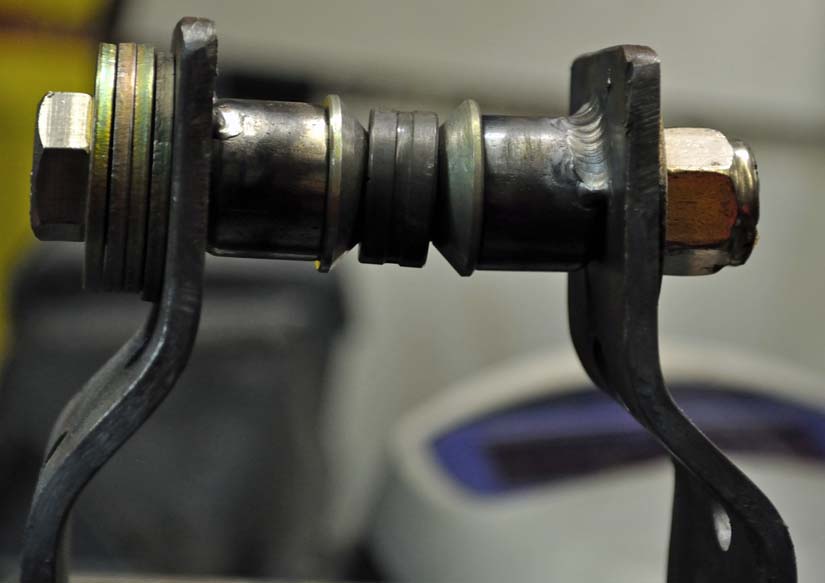
I used safety cone washers to retain the rod end in case I pop a ball out.
I can adjust the length of each end link via the right and left hand threaded rod ends. These allows me to un-load the sway bar after adjusting cross weights in the car.
So now the front end is pretty much complete and ready to be installed in the notchie.
------------------ yellow 88 GT, not stock white 88 notchie, 4 banger
I had been waiting a while for the rod end seals to show up so I could finish putting together the front end.
These rod ends are your typical two piece metal to metal unit. Once they get gritted up, they stick, then wear out fast. These rubber seals will greatly extend the working life of any rod end.
I used safety cone washers to retain the rod end in case I pop a ball out.
I can adjust the length of each end link via the right and left hand threaded rod ends. These allows me to un-load the sway bar after adjusting cross weights in the car.
So now the front end is pretty much complete and ready to be installed in the notchie.
i love this build thread . the front end looks awesome . the only critique i have is the single shear mounts on the sway bar ends .there may be some deflection there .keep at it , i allways look foreward to your updates .
wtfb- yep, it's a concession on the arms. I'll probably have to rework the lower shock mounts once I get all the weight the front end figured out and then I can sort the linkage out.
Thanks for the nice words.
------------------ yellow 88 GT, not stock white 88 notchie, 4 banger
Damn thats looking really sweet, your giving me something to aim for in my build............I'm jealous right now I haven't gotten to work on mine for a couple weeks.


 The Ford units are about twice the size of the stock 88 pieces and weigh about the same.